Rear shock Absorber Replacement


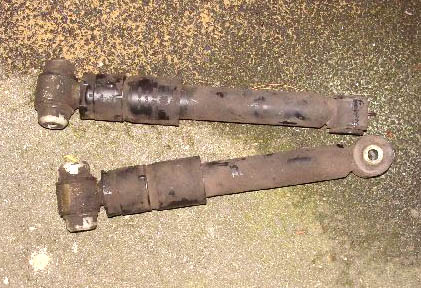
There will come a time in most cars lives when the need arises to replace the rear shock absorbers, I must admit that the fact that mine needed to be checked and replaced was after quite a severe test.
The wife, her sister ,and two friends wanted a lift to a party which was no problem until they all got in the car, seat belts fitted we set off.
All was fine until we had to go over several sleeping policemen en route (humps in the road to reduce the speed of vehicles in residential areas)when on each occasion I heard a grouching sound coming from the rear end of the car, almost as though the tyres were toughing the inner plastic wings.
Taking the rest of the short journey cautiously I got them to the destination, and later taking a different route got them back without further problem .
However I now needed to explore the reason for this noise when carrying what was obviously a maximum load, none of them or myself being light weights.

Despite the fact that I have fitted 16 inch wheels recently, as are fitted as standard on the 'Avantgarde' model A160, there was no obvious signs of rubbing of the tyres and the tyres had not rubbed the plastic inner wing liners, and so I concluded that the noise was the shock absorbers bottoming out, which clearly indicated it was time to change them, they now being just on ten years old.
In that time period the car having covered 51000 miles they have taken many shocks and the current state of British roads particularly over the last two years has not helped.
I decided I would replace the shock absorbers.

Remember when checking shock absorbers apart from checking for bounce,(These units are gas filled and so unlike most cars you will not get the fluid leaks that indicate the unit is defective.
If you push down on the rear of the car any bounce will be limited by the shock absorbers, albeit if suspect the only real test is to remove and physically check each unit,) the bushes need to be in a sound serviceable condition.
This information received from an owner may help those of you who cannot locate or get a spanner onto the top shock-absorber inner nut.
Hi Lofty,
Have owned our A170 for a few years and have used your FAQ a few times - many thanks.
Read you advise on changing rear shockers - the top bolt is completely hidden between sub-frame and chassis.
I've just replaced mine and found the easiest way was to undo the two rear sub-frame bolts and lower the rear sub-frame on a jack until it exposes the top shocker bolts (with the rear of the car on axle stands). Hope this can be of some help, sounds like a sound idea.
Thanks

However you will see I managed to undertake the job without the need to lower the sub frame and although getting the top nut back on was a fiddle still only took about and hour a side. Although I stress the 4mm wide Max 16mm open-ended spanner is a necessity

I purchased the new shock absorbers from GSF Carparts
(Their Part Number 523ME0180 part number M55060 description Shocks ABS-Re Gas Cost £32.65 plus 20% Vat each they had them on the shelf at my local branch and with the discount available through this site felt they were reasonably priced.
I did not get a price from Mercedes-Benz Parts on this occasion.


I was aware that the job was not straight forward because of the location of the top securing nut on the shock absorber, this is extremely difficult to access and a 16mm thin open ended spanner has to be available, the spanner I used was the spanner from an angle grinder kit 15mm which I adapted by increasing to 16mm, designed to hold the motor spindle tight while loosening and tightening the disc clamping nut, this was the thinnest spanner I had at 4mm and even then the access to the nut on the off-side shock absorber was extremely tight and difficult to get at.


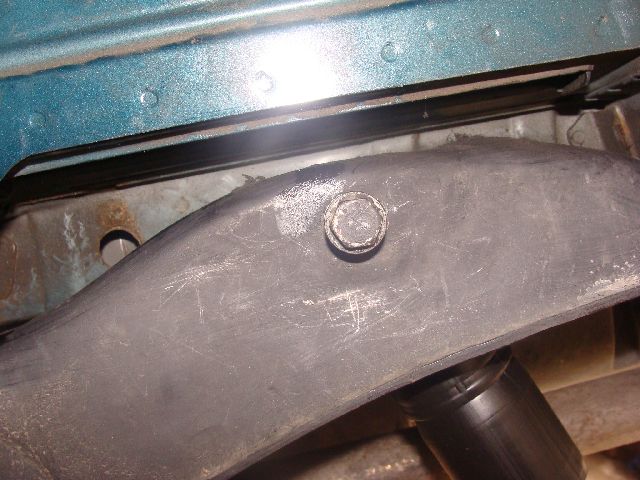
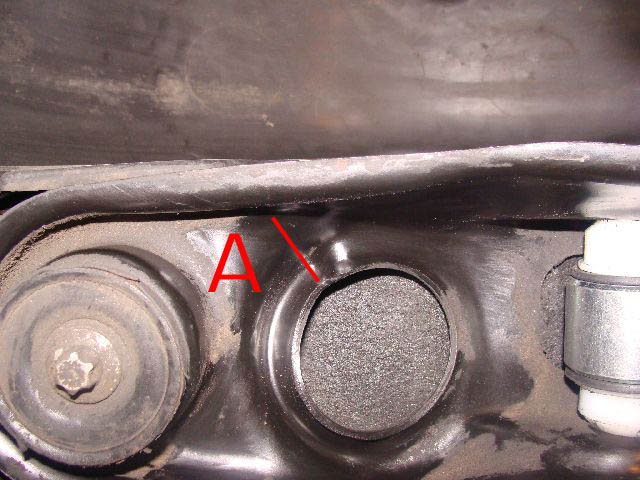
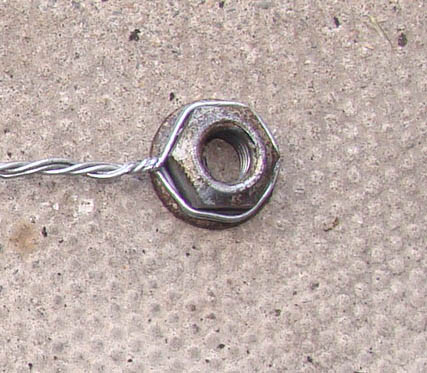
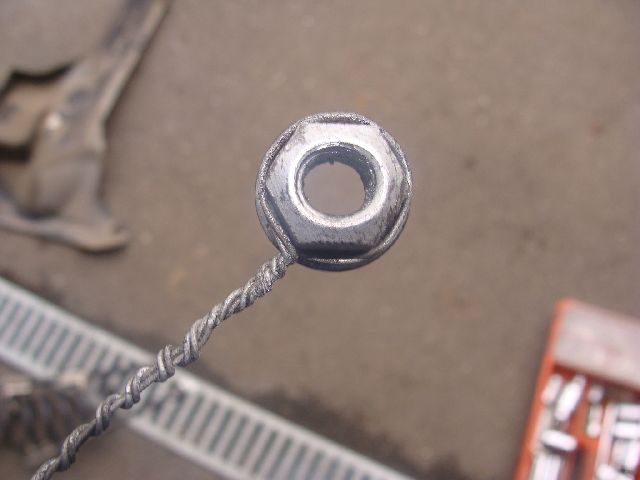
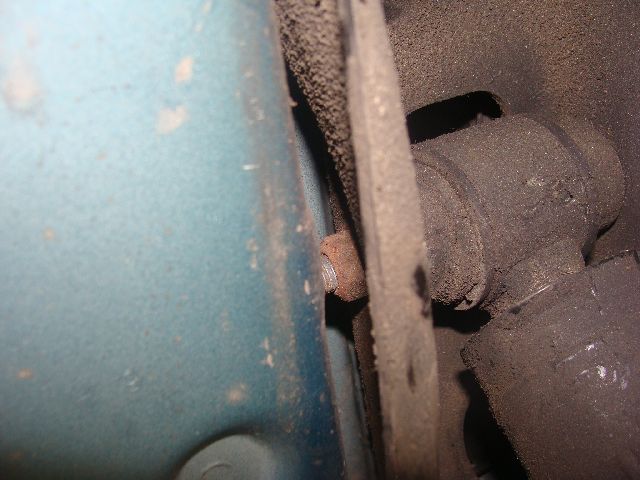
Bear in mind that this nut is not encapsulated or fixed in place and so when fully undone drops drown the back of the rear sub frame, although it is quite easy to get out using a hack saw blade .
You do however have to get it back into place when you have fitted the new shock
absorber.

There is insufficient room to get your fingers in position to hold the nut while the bolt is turned and therefore I had to come up with a solution, somehow the nut had to be got into position and held there while the bolt was turned to engage the thread in the nut.(This task tests the patience of a Saint and is not easy to do. )


When pushing the new shock absorber up into the sub frame it will be found to be a tight and takes some minutes to get the unit into the correct position to be able to slide the bolt through , I also ensured the shaft of the bolt was greased in each case.
test the positioning to ensure the securing bolt slides through the sub frame and shock absorber bush before attempting to fit the nut, then remove.


I finally positioned the nut, this was checked using a torch to ensure the nut was aligned with the hole, I finally settled on a four stranded improvised wire tool, the wire twisted round the head of the flanged nut which gripped it tight and allowed me to position the nut behind the sub frame (when the wire was tightened around the flanged hexagonal of the nut it held it firmly) I was then able to turn the bolt and engage the thread of the bolt.

I then disengaged the wire from the nut and replaced it with the narrow 16mm spanner, this allowed me to then fully tighten the nut and bolt.
The wire was easily bent to be able to get the nut into the correct position although the procedure was a fiddle and took some minutes.

I seriously cannot think of any other way with out usingh the previous readers suggestion of lowering the rear sub frame complete which to me seems a lot of work.
I must say that E.T would have been most helpful with this task, his fingers would have been thin and long enough to do the job.


Having got the nut held in the wire holder the wire can be bent so as to position the nut in line with the bolt, which can then be turned to engage to the thread. Both the thread of the nut and bolt were lightly greased to ensure ease of movement.


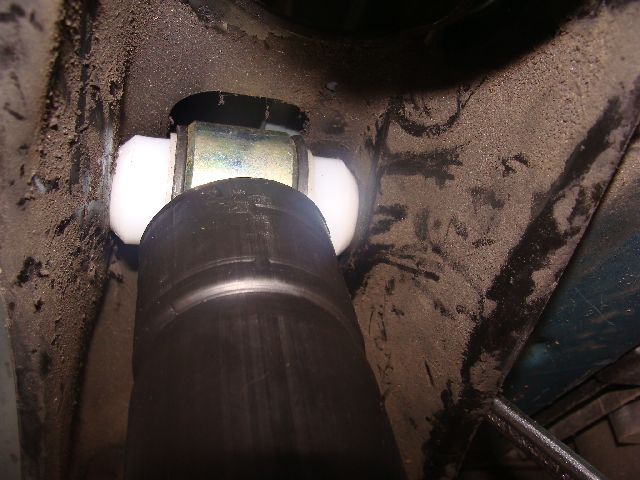
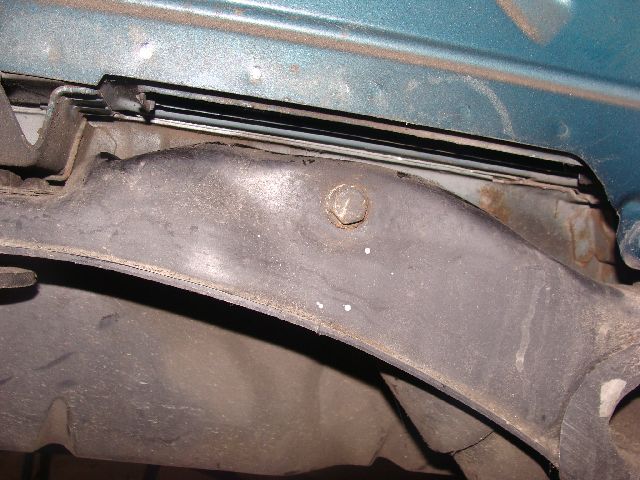
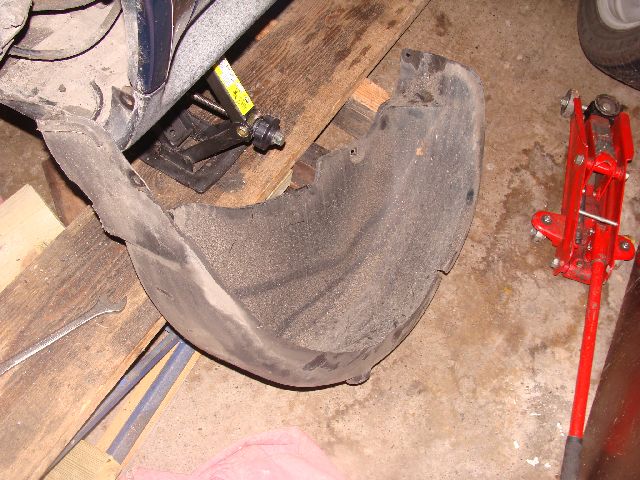
To facilitate more space I removed the inner wing plastic cover held by only 3 plastic nuts, this procedure is recommended by MB although it provides very little extra space. Note I did not remove the lower stud but took care not to damage the plastic liner as it was removed from the wing.
I also removed the plastic under body panels either side off the fuel tank, this provided a little more room.

When working on the nearside I released the rear exhaust bracket which enabled me to move the exhaust tail-pipe slightly while getting at the obscured nut at the top of the shock absorber

The same procedure had to be followed on the off-side BUT there is a little wider gap which makes the job just that little bit easier.


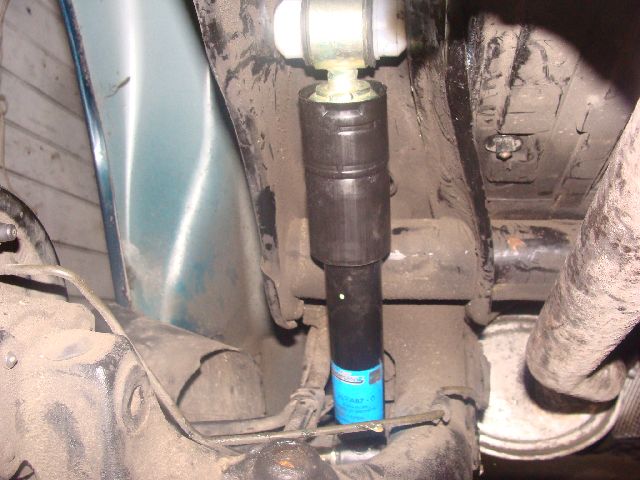
Do make sure you position the shock absorber correctly before fitting bolts, I can vouch for the fact that it is easy to get it wrong!

The lower nut and bolt 18mm are easy to fit, however on the first side I found it very difficult to re-align the torsion bar so as to allow the bolt to slide through.


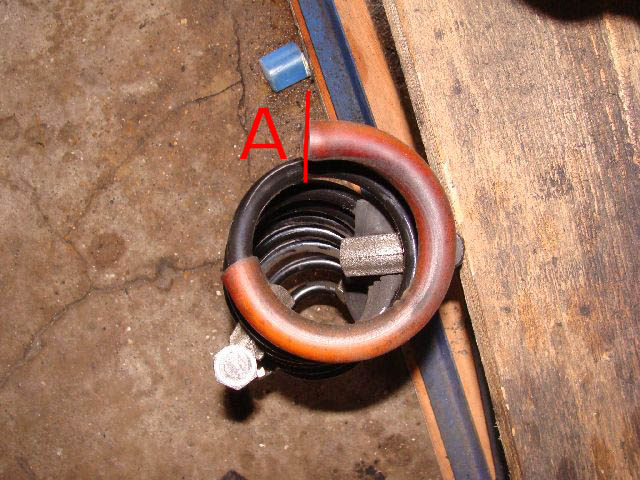
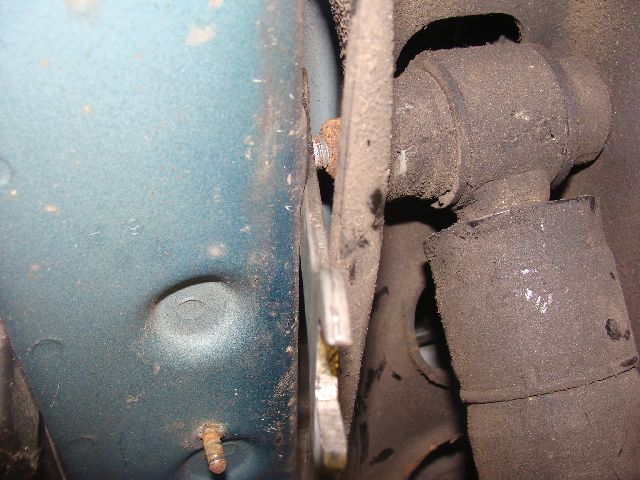
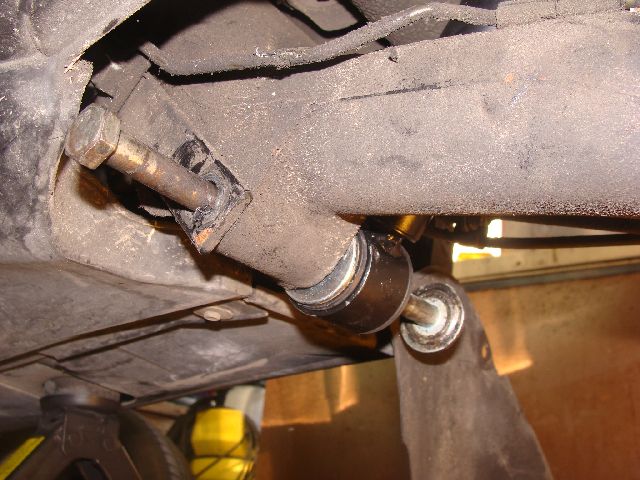
On the second unit having removed the securing nut, I used a 12mm dummy bolt with a slightly tapered end to secure and hold the torsion bar in place, as I then gently tapped the dummy bolt in, the securing bolt was removed and visa versa on re-fitting which kept the torsion bar aligned.


The 12mm bolt approx 125mm long with tapered end used to keep the torsion bar aligned with the swinging arm while the shock absorber securing bolt was removed.
In the upper right photo, you will see what happened when I withdrew the securing bolt, on the off-side. I then found it quite difficult to re-align the torsion bar .
The dummy bolt prevented that on the near-side and saved me a lot of aggravation and time.


Note the lower bolt will only slide through the shock absorber bush one way, simply revolve the lower section (Ram)and the bolt will slide through the bush, as shown in the photo on the right.
Failure to check this and you will find the the bolt will not slide through the lower bush. Initially I though I had got the wrong units until I turned the ram round and found the lightly greased bolt just slide through with ease.
simple mistake and something I have not encountered before.


These photos show the spring compressed using spring compressors


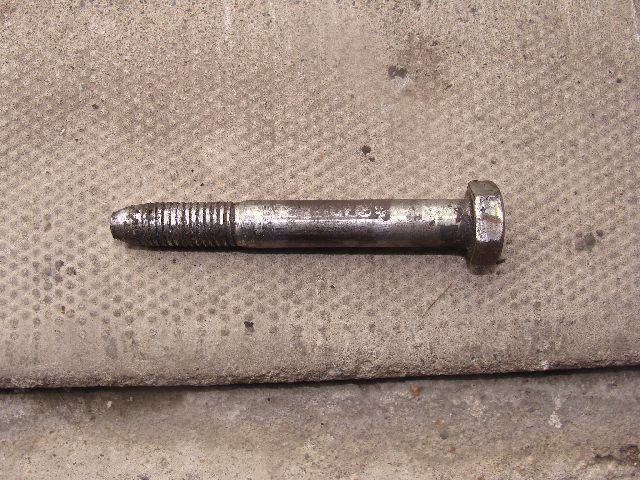
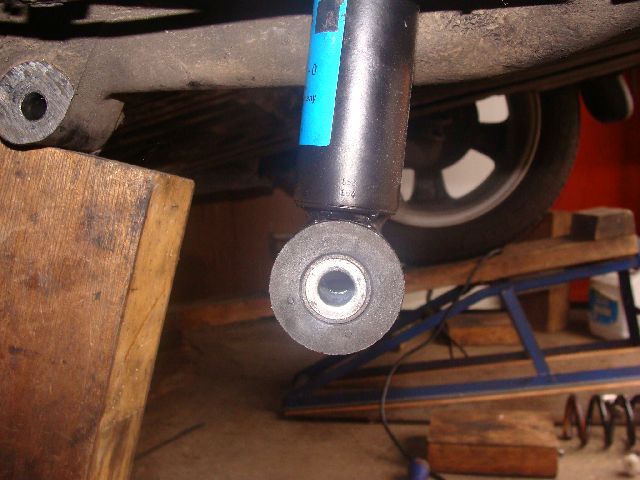
However I found by far the simplest way to remove and replace the spring was to remove the lower shock absorber bolt (Fixing ) and then press down on the arm to remove and replace the springs.

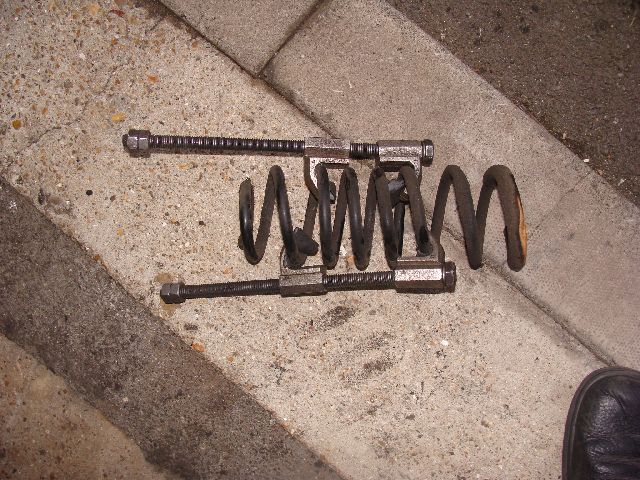
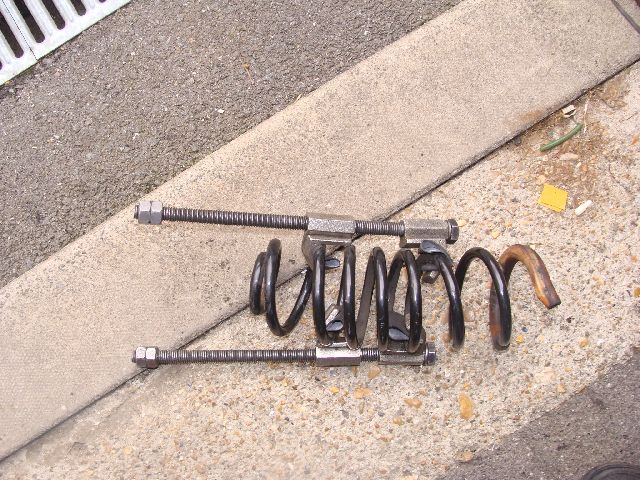
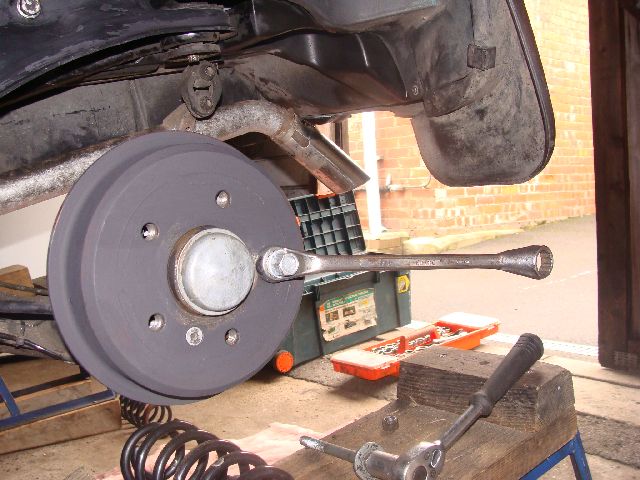
I attached a long ring spanner to the rear brake drum using one of the wheel bolts and with the hand brake firmly on, used that as a lever to lower the trailing arm sufficiently to remove and replace the springs.

To replace the lower securing bolt I simply jacked the swinging arm up until the holes in the shock absorber lower bush and swinging arm aligned, I then pushed the dummy bolt out as the securing bolt was pushed in .


Note
If you have the new rear springs then the metal cup and rubber at the base of the spring have been deleted, If like me you still have the original springs then you would be wise to purchase the rubber cups and metal caps prior to starting the job.


Note the rubber and metal caps are designed to only fit one way ,as is the spring the tail of the top of the spring must align with 'A' When fitted therefore ensure the are correctly positioned before finishing the job


Having removed the nearside shock absorber I found that it was at least as good as the new units purchased, being very hard to compress, however the off side unit was very week and I am confident this was the cause of the problem, both sides have been replaced with new units.
The car now drives well and the rear feels more positive.


One other thing I did before replacing the original springs was, at the top of the spring there is a plastic tube/sleeve fed onto the coil of the spring , the surface that contacted the spring housing on the car was flattened and worn , I therefore revolved( Twisted ) it 180 degrees which will now allow the unworn section of the tubing to be used


Because I was held up for parts requiring new metal and rubber caps Part numbers 1683260187 cups & 1683250084 rubber cups I took the opportunity to spray the inside of the metal wings with 'Duck oil' this will help preserve the metal which is hidden by the plastic liners when re-fitted


Tools required :-

All tools associated with removing the wheels
Plus:-
16mm spanner open ended, no more than 4mm thick
16 mm socket 3/8" or 1/2" drive
18mm socket 1/2" drive
18mm ring spanner
One small/medium Phillips screw driver
Spring compressor tool (Not required if using the procedure on this page.)
12 mm bolt with tapered end (ground to slight taper)used to hold torsion bar in location while main bolt is removed)
Hack saw blade for retrieving 16mm nut from behind rear sub frame.
You will need small sockets for removing the plastic inner wing retaining nuts
small sockets/spanners 10mm & 8mm for removing the panels either side of the fuel tank.
Complete one side at a time


For ease of work all the tools associated with working below the car are required:-
Ramps,
Blocks
Wedges,
Jacks, jack supplied plus One trolley or hydraulic jack

It is strongly recommended that you have a container to put the nuts bolts etc into
These small parts have a nasty habit of getting lost

Work safe at all times if you are not confident that you can complete the task then seek the services of a good garage, any mechanic should be able to undertake this task. but buy your own shock absorbers or you will pay the garages high prices

Service items:-
Replacement shock absorbers (Always replace in matched pairs)
GP Grease
New nuts 16mm & 18mm or lock-tight
Cloth for wiping off component parts

New locking nuts should be fitted when fitted new shock absorbers, failing that use lock tight to ensure the bolts remain secure.

If you are inclined to tackle this job, then allow your self plenty of time and make sure you have the correct tools to do the job.
I would rate this job 7/10 for difficulty, purely because of the problem of re-locating the upper shock absorber securing nut, as far as I can see there are no short cuts, just perseverance and patience.

But you will save yourself a tidy sum if you are able to DIY.

Dispose of your old gas filled shock absorbers responsibly, there are instructions with the new units for discharging the gas from the old units, I simply handed them to my local waste management team telling them they were gas filled. I suspect the garage used to undertake this job would charge extra for the disposal of the old units. Good Luck Lofty


Next.
Back to Index,
Purchase DVD.
Please Make a Donation.