One of the most disappointing things about the 'A' Class is the amount of damage sustained to the bonnet by stones, with a dark coloured car this is even worse as every little chip shows the white undercoat beneath it. However these can be repaired quite easily if you are prepared to spend a small amount of time dealing with them, I've found it is best to deal with them as the appear rather than let their numbers build up.
The first thing you need to do is get a touch up kit together, Paint, colour coded to your car, mine was obtained from Mercedes Benz and cost about £7.50 for the colour and varnish.
Very small paint brushes, nail polishing boards fine and polishing quality. Lidl's Superstores have nail kits every now and again and they really are cheap. Thinners, for cleaning the brushes & thinning if required. Polish, nothing to harsh, you are only polishing varnish. The matchstick is only intended to give you some idea of the size of the brushes .
Now I'm not suggesting that you go and buy a gallon of polish or thinners but you will require a small amount of each. The thinners Part No BSTH5 I'm sure can be obtained in smaller quantities, but having done a bit of bodywork spraying in the past I still have some left over. Its not expensive, but keep it somewhere safe, preferably in a metal cabinet it is very flammable. The polish Part No BNCP5 I chose to purchase for my earlier car, and then spread the gallon round the family, they all have cars and it is good quality and not abrasive but gives a high polish. Both of these items were purchased from Partco Autoparts, Part of the Unipart Automotive limited www.unipart.co.uk

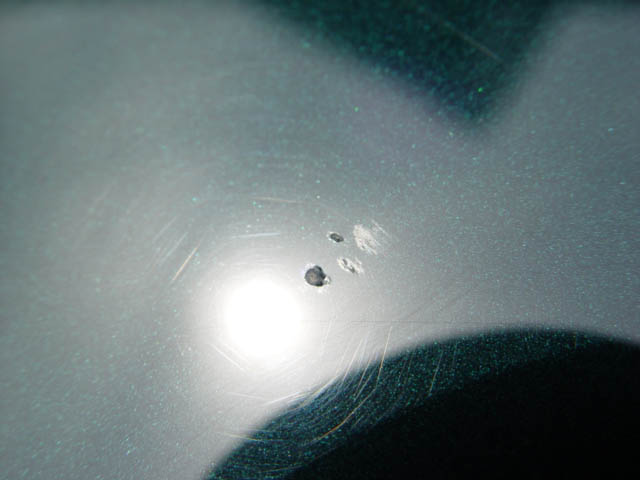
This is typical of the damage that a stone chip does to the 'A' Class bonnet, the damage is deep enough to have penetrated the undercoat, which on my car is white, and really needs to be dealt with as soon as possible. The damage always looks worse than it is, and after being very, very lightly rubbed down with a very fine board already looks a lot better.
This job is best done on a warm dry day. Our next task, ensuring that the paint is well shaken, essential with metallic paints, is to apply a very small amount of colour to the damaged area, we are not repainting the car! Only touch up the area that is affected by the stone. Having applied the colour/paint, clean your brush and allow about 15mins for the paint to dry, Turps will not remove paint from the brush & is not suitable for thinning the paint.
Right now we apply a small amount of the clear varnish slightly overlapping the colour. Now I know this looks like a disaster, but do not panic. Having allowed this to dry for about a 1/2 hour we can rub down the varnish to the flat paintwork, this is done with great finesse, take your time, and use only the finest of nail boards, keeping you action very close to the repainted spot.
Yes this is the same spot, enlarge it and you will still a small amount of damage but I think you will agree it is a vast improvement on the chip before we started, which had been polished as a separate area then the whole bonnet polished to blend in the area overall. Do not be tempted to use 'T Cut' it scratches the relatively soft varnish finish on this car.
After a few coats of polish it will hardly noticeable B the sad part is that by then there will be more chips waiting our attention, however once you have your materials the cost is infinitesimal A shows the original damage.
1 It is very difficult to show the stages of repair, we start with locating the damaged area which is very small
2 Then rub it down,
3 Then apply colour,
4 Then apply varnish
5 Then rub down flat with other paintwork
6 Then polish, although the damage can still be seen by the camera it is very difficult to see it with the naked eye, certainly it is better than having paint chips all over the bonnet. The area in 6 is not larger than 1'32" and so is barely visible
Many of us will have heard of a bad hair day! well I certainly had one on Monday the 18th October 04, firstly I ran into a concrete bollard which thankfully moved when I hit it with my front bumper, then while backing my trailer through some narrow gates hit the near side rear wing. I said just a few things other then curses and there were some of them I can tell you.
In both instances 1 & 2 show the before and after repair
Remember to build the layers of paint back up slowly & only when your satisfied with your repair apply that coat of clear varnish. Surprising what you can do to undo that sickening damage if you apply your mind to it. Far less work of course if you apply your mind fully to your driving in the first place!
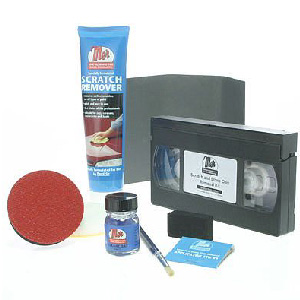
 However if you haven't got the accumulation of brushes, thinners and fine rubbing down papers as well as the basic knowledge, why not follow fellow owner, Tony's idea. Purchase a 'MER' scratch and Stone chip repair Kit. (That's the same company who advertise at open markets and alike, light blue container gold top, you must have seen them polishing away at a Flame red Mini bonnet! I have used their polish and very good it is to.) That will have all the basics you need and along with the paint touch up kit, colour coded to match the paint of your car and varnish, available from Mercedes-Benz for about £7.00 you can have a go.
 And to assist you in getting it right 'Mer' will provide you with a step by step guide on DVD, FREE of charge, available on proof of purchase. Tony reckons it is worth every penny, he should know he's used it. 'MER' Products.com for details.
Next.
Back to Index,
Purchase DVD.
Please Make a Donation.