 Alex works in the motor trade and so had a leg start on the majority of car owners, never the less I suspect that even he was a little taken aback when he found out that to get at the starter motor the complete engine would have to be at the very least dropped.
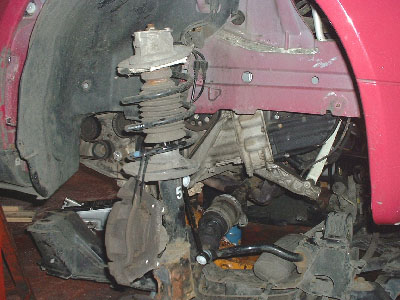 This is not a simple task and if it is to be done safely a number of professional tools are going to be required and well as detailed instructions if component parts are not going to be damaged as the engine is lowered, as well as important settings like gear cables, ESP/ABS connections etc. disrupted or lost
 Never the less not to be dissuaded Alex went ahead and managed to lower the engine sufficiently (80mm being the max amount the engine can be lowered without total removal) and managed to remove and replace the starter motor, an achievement in itself.
HOWEVER that was not to be the end of the story because once Alex removed the old defective starter motor he found on inspection that the ring gear, the main gear wheel which surrounds the fly wheel was substantially worn and needed replacement.
There was no option the engine had now got to come out, the gearbox would have to be split from the engine and the flywheel replaced. Never the less and despite this is a big job he wasn't put off and went on with not just professional tools in the form of heavy jacks and axle stands but with an assistant, to remove the engine both being very essential if the job is going to be done successfully and safely; as in many instances you do need to be in more than one place at the same time. Observing the lowering of the engine as well as looking out for items which need to be disconnected or have hooked up or become obstructed is an impossibility on your own, and in any case on a task this large you there really does need to be two operatives purely from the safety point of view.
Having to Replace the complete flywheel to replace the ring gear was a new one on me, all ring gears I have seen replaced, mainly on earlier cars, Hillman's, Humber's and Morris engines, the ring gear was bought and replaced as a separate item, the old gear-wheel was drilled through and then chopped off the flywheel and the new ring gear heated to expand it, and then placed on the flywheel and while still very hot positioned then cooled, where it then held in position purely on the contraction of the steel on steel, these days on this automatic at least, it appears the complete flywheel and ring-gear is replaced and as it can be seen the ring gear is pre-welded into position. The only observation I would make is that this fly wheel is off of an automatic and this may well account for the lighter construction as it is bolted to the torque converter and not direct to the crankshaft as is the case in a manual gearbox car.
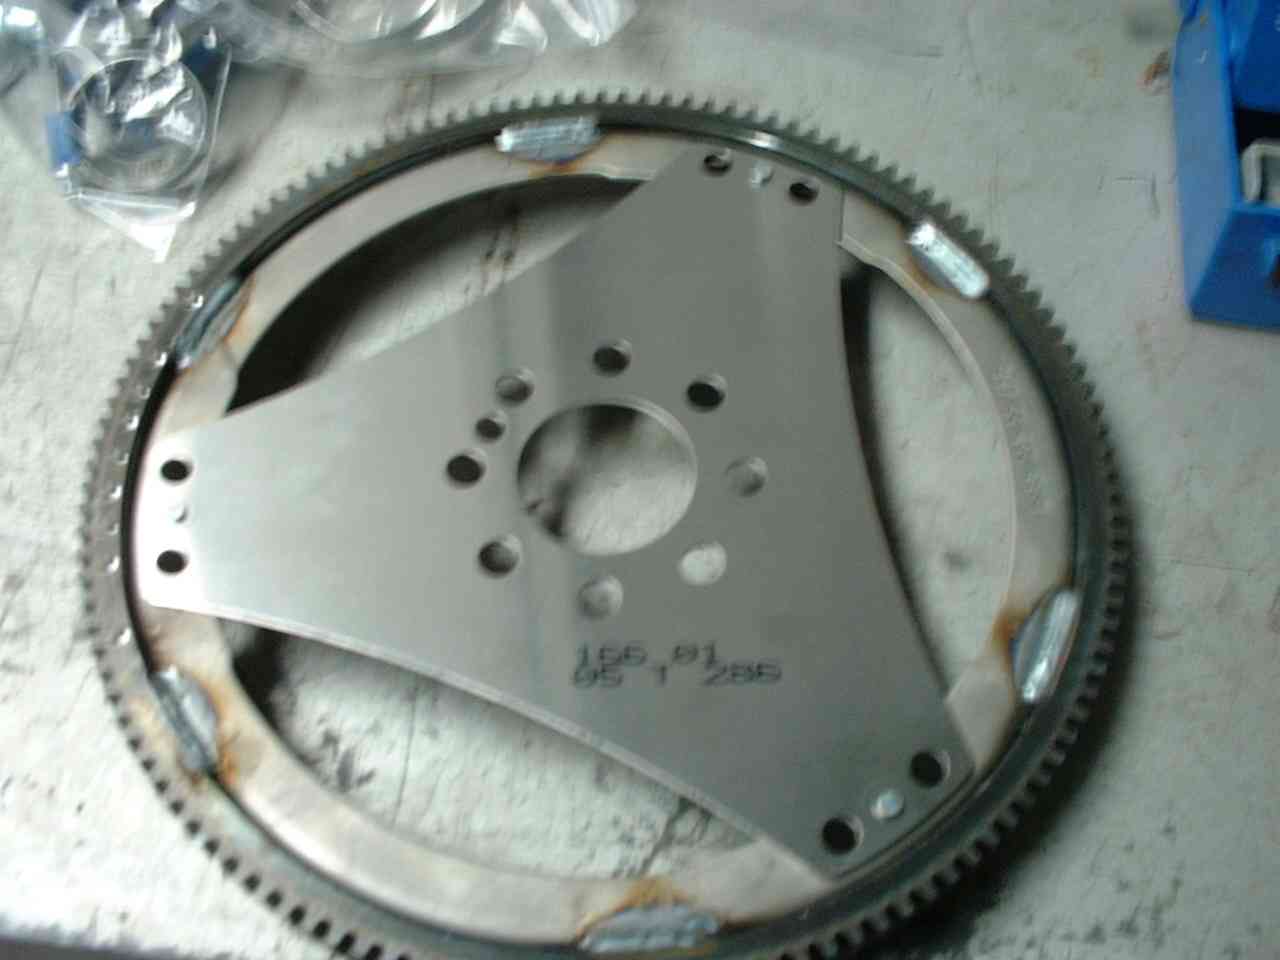
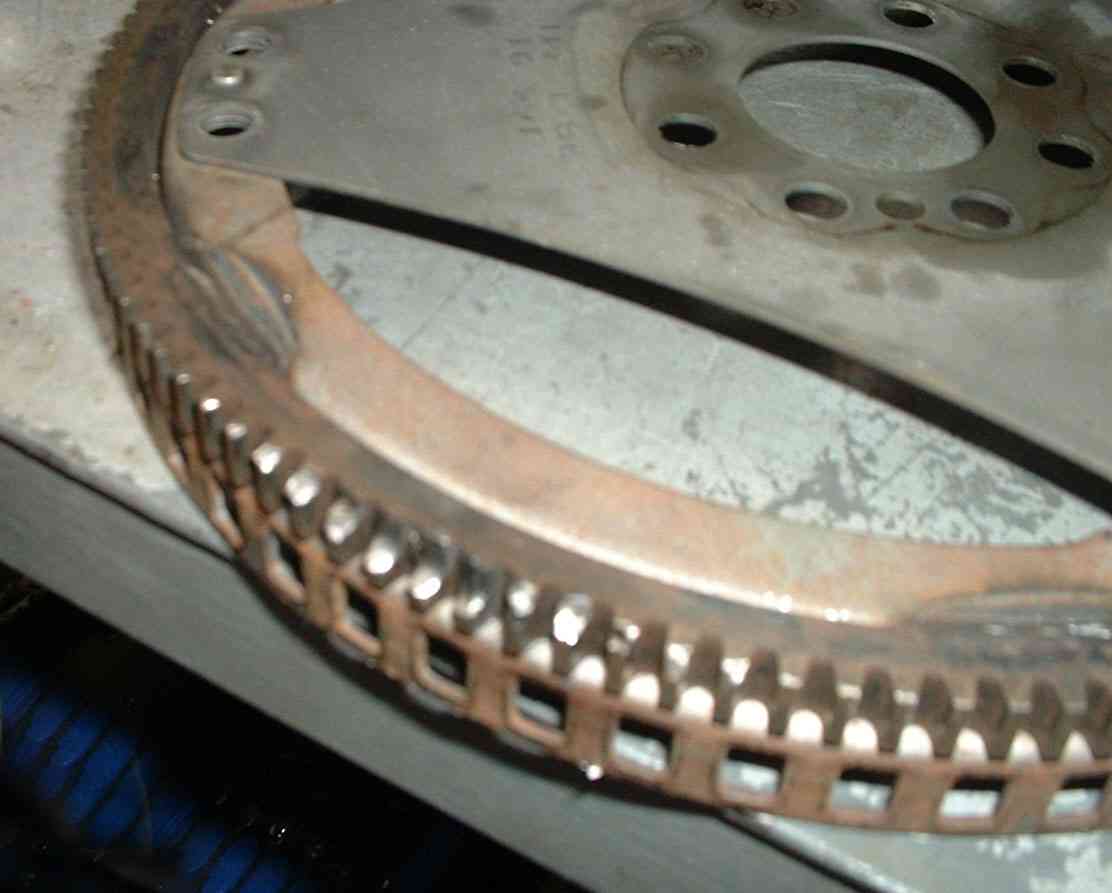
Flywheel as fitted to an A160 S. Reg. Automatic The ring gear can be clearly seen running around the circumference of the flywheel .
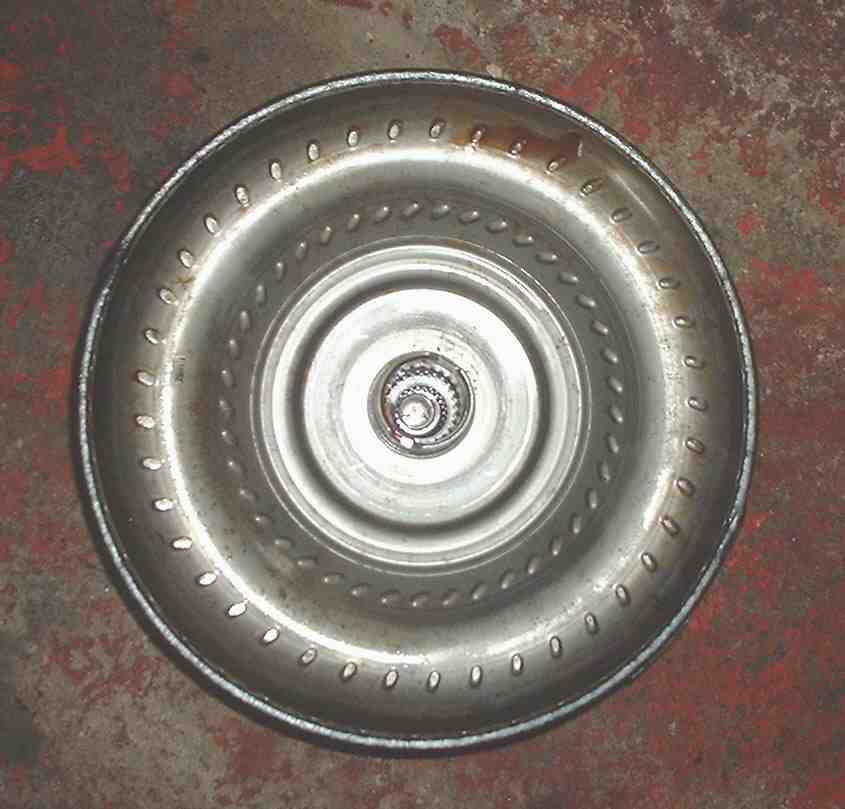
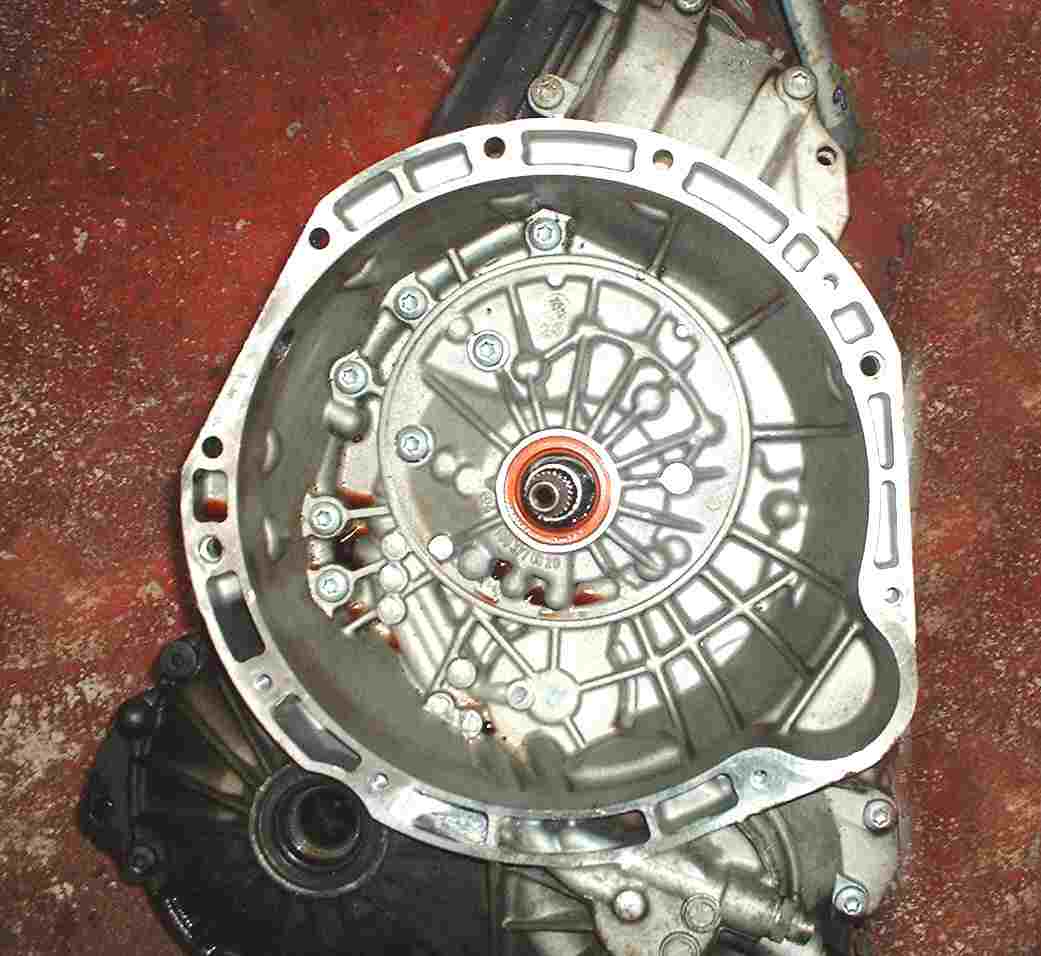
This photo shows the drive face of the torque converter the fly wheel being bolted onto the reverse side. In both manual and automatics the flywheel can only be fitted in one position due to the location of a peg which locates into both flywheel and drive, (Torque converter or direct onto the Crank shaft in the case of manual gear box)
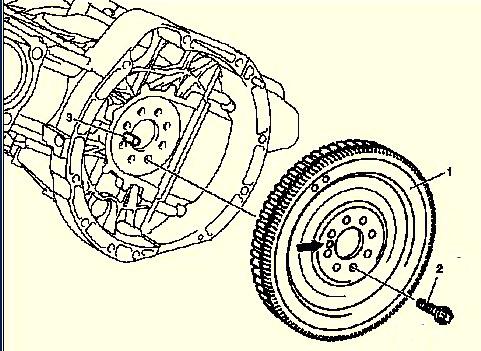 It is worth noting that the flywheel shown for the A160 manual gearbox is a solid looking flywheel, and appears nothing like the lightly constructed flywheel fitted to the automatic.
I am assured that the automatic's flywheel is lighter in construction as the momentum required to keep the engine spinning is compensated by the torque converter which when installed increases the weight of the flywheel.
 It is however interesting to note the construction of the flywheel, although I cannot be certain, I feel sure that the square multiple cut-outs around the back of the fly-wheel are tied in, and work in conjunction with the 'crank-shaft position sensor'.
 The reason for having to take this engine out in the first place is now visible for all to see .
The very severally worn teeth in the foreground, A which if left could well have caused even the new starter to fail to engage and thus turn the engine over. (rotate the crank-shaft) It should be noted that although this section of the ring gear is damaged by wear the remainder of the wheel appears to be in good condition, however due the the compression cycle causing the engine to stop in one of four positions there is likely to be four worn areas on the ring gear. It is therefore important to turn the flywheel through 360 degrees to inspect the ring gear or the worst area of damage on the fly wheel/ring gear may go undetected. This inspection can be done through the opening left by the starter when removed (bell housing) where the starter is normally located.
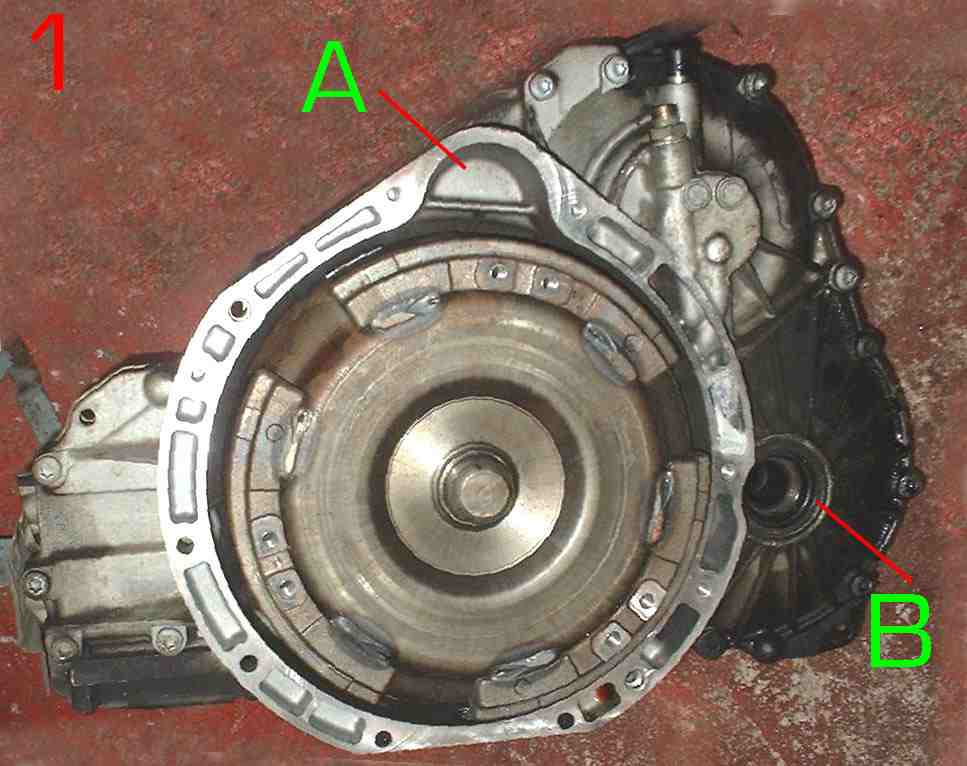
1 Shows the torque converter still in situ in the gearbox.
2 shows it removed.
Having removed the engine the gearbox was now removed (split from the engine). The arch A seen at the top of the casing is where the starter motor nose cone locates.
 B is where the off side drive shaft engages.
It is quite often this seal B situated within this casing that leaks oil, which shows on the drive shaft, this seal can be replaced without removing the gearbox, the seal is not an expensive item although there is still quite a lot of work involved in changing it, unless like Alex you have the engine out and drive shafts withdrawn.
 Having fitted the new ring gear and starter motor, Alex did a couple of other jobs before replacing the engine.
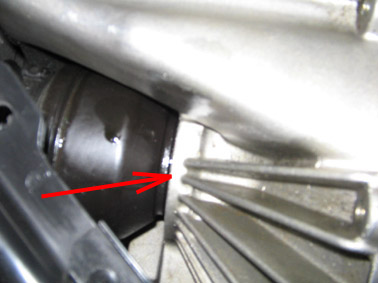
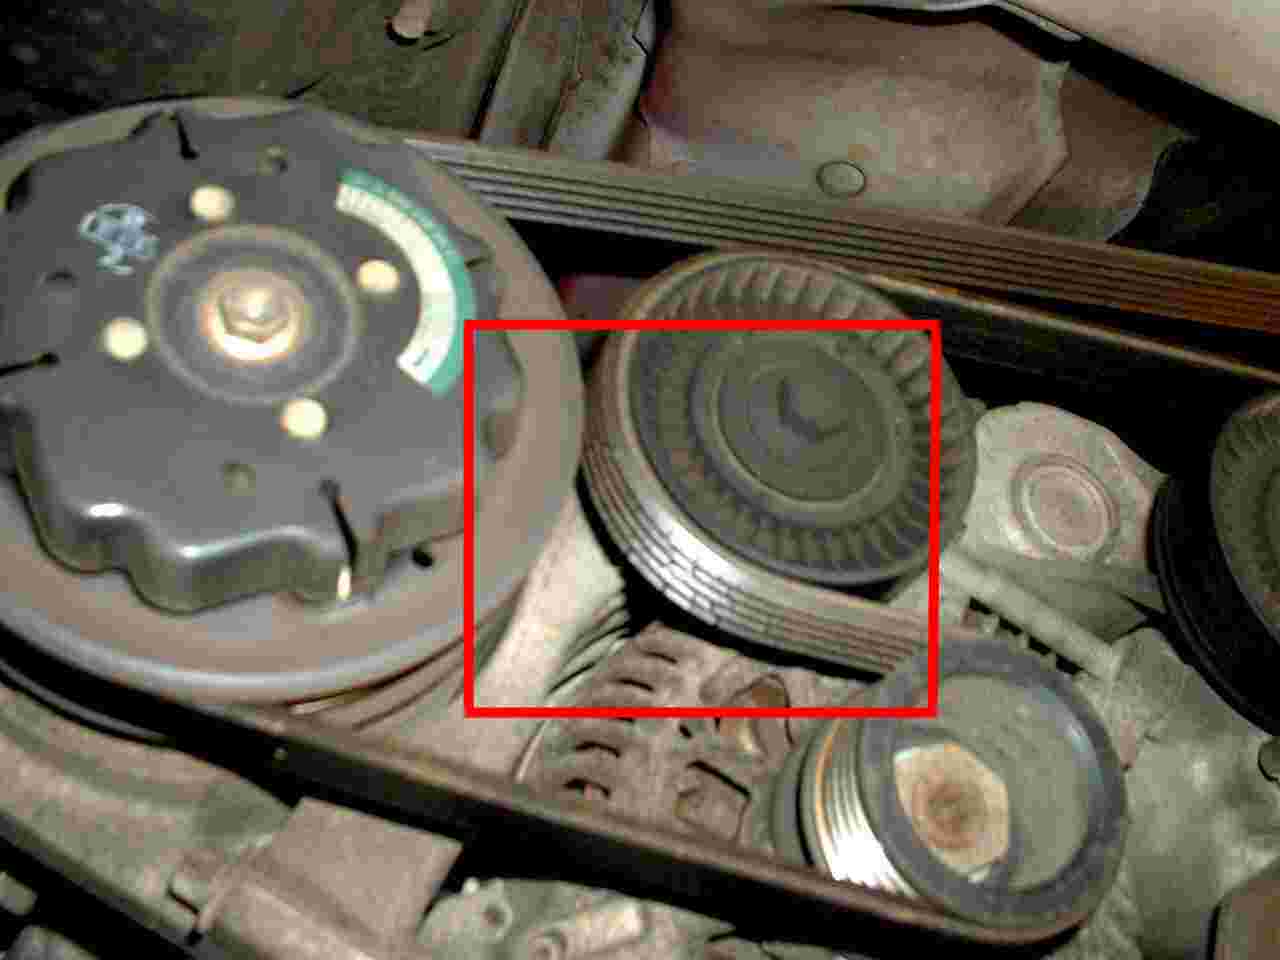
He replaced the Poly 'V' Belt which as can be seen was very near the end of its life, indications that this in the case are the small multiple cracks which appear across the structure of the belt. C
While changing the belt the pulley wheels should also be checked for wear and the belt tensioner checked for correct operation. Although a difficult job ,the belt can be changed with the engine in situ, however should you have problems with the tensioner the engine will need to be lowered at least.
The other job was the drop links, minimal cost and cuts out a lot of the rumbles that come from the front of the car if they are worn.
Although Alex completed the task and the car is now running fine, the amount of work and equipment required as well as a garage to undertake the work is essential, It is also worth noting that had this car gone into a garage for a starter motor replacement the result could have gone two ways.
1 The garage could have dropped the engine and replaced the starter motor as requested and left the ring gear. And I suspect that in some garages at least, that decision would have been based on whether they wanted the job, or even spotted the problem! OR having spotted the problem, they phone up the owner with the shock news that the ring gear has gone and that the bill will now be in well in excess of £1000 as the engine has got to be removed completely.
Option 2 they replace the starter only to find that it wants doing again in a few thousand miles, because the wear to the ring gear prevents the the starter dog engages on the flywheel and thus turning the engine over to start the vehicle. In years past the problem was overcome by use of a starting handle, turn the engine a quarter of one revolution and the starter dog engaged on a different part of the flywheel ring gear. To day, on the 'A' Class at least the only answer is a costly repair.
Prevention is better than cure, and cheaper.
One of the major factors in starter and ring gear wear is obviously the amount of use it gets. The conditions of operation of the starter is dramatically affected by the condition of the battery which also of course affects the ignition and other electrical features on the car. A partially discharged or weak battery leads to a sluggish starter motor action, which can lead to unnecessary starter and ring gear use and wear. As an aid to good starting it is therefore worthwhile ensuring your battery is fully charged and also that items such as spark plugs are replaced and the prescribed intervals on the service schedule or Sooner.
A strip down of the defective starter motor after its replacement revealed that the nose cone bush (normally made of phosphorous bronze) had failed, this allows the armature of the starter motor oscillate causing it to short circuit on the motor casing as well as allowing the starter motor drive to move away from the ring gear/flywheel. This is a common fault on starter motors, on a number of which can be corrected with the offending bushes being replaced. On my Renault 6 for instance this was a very common problem but the starter could be removed in 20 minutes and the bush, available a spare part replaced in 30 mins, albeit the bush had to be soaked in oil for 24 hours, vastly different to the situation on the 'A' Class. I have not however heard of situations where an 'A' Class starter motor has been repaired.
Alex has confirmed that these motors can be re-conditioned, if repairing your own motor the costs may well depend on the type of repair undertaken, but it is worth bearing in mind that anything less than a fully reconditioned motor would not be worth the fitting time, as a repetition of the forgone problem with all that it in tales, engine lowering or even removal would make the replacement less than cost effective.
I would like to thank Alex for the photographs displayed as well technical information included on this page.
Next.
Back to Index,
Purchase DVD.
Please Make a Donation.