Replace Air Conditioning Carbon filter (Pollen Filter)
Severe misting when turning on the heater blower? See the information at the bottom of this page Now, Before the real problems start!
Replacing the pollen filter is as easy if not easier than changing the Engine air filter and will only take minutes if you have the New filter to hand. The part number for this items is :-169 830 02 18 and the cost with VAT @ 20% is £36.24 (02.01.2013) so will make a bigger dent in your pocket than it will in your working day! However Mercedes-Benz recommend this filter be changed every two years.
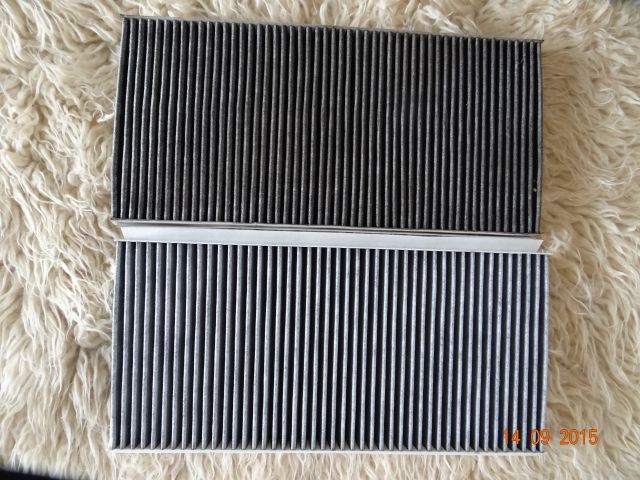
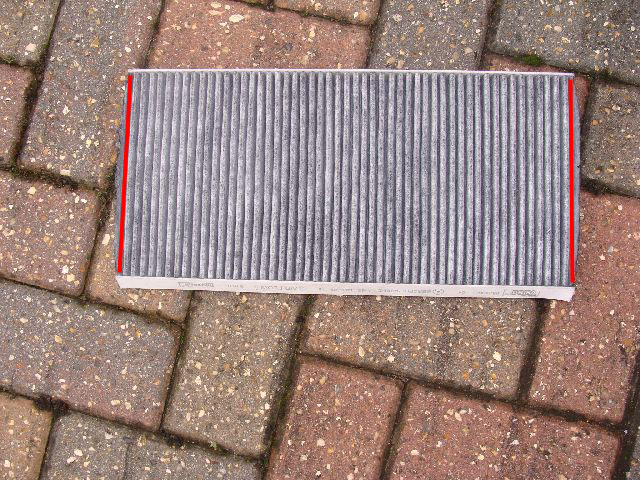
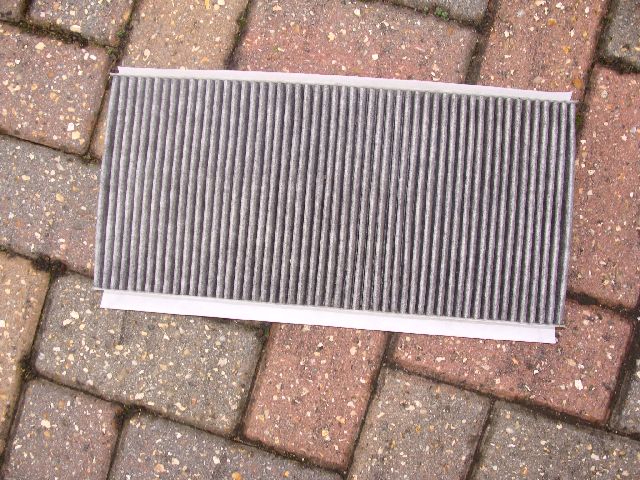
The photo of these two filters clearly shows how dirty my existing unit is I have therefore just replaced the one on my W169 I used a Mann Filter CU/CUK4054 from Euro car parts which cost £19.49 inclusive of VAT delivered to my home address. However if you pay less expect to get less.
In this case there are 10 less folds in the activated carbon filtration body which basically means that the filteration qualities must also be less efficient or it will not last as long.
However at that reduced cost you can replace every year and only be paying £3.00 more than buying a mercedes Filter at close to £40.00.
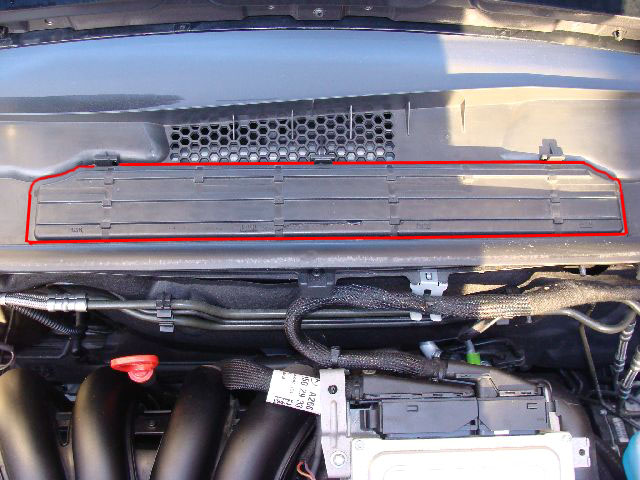
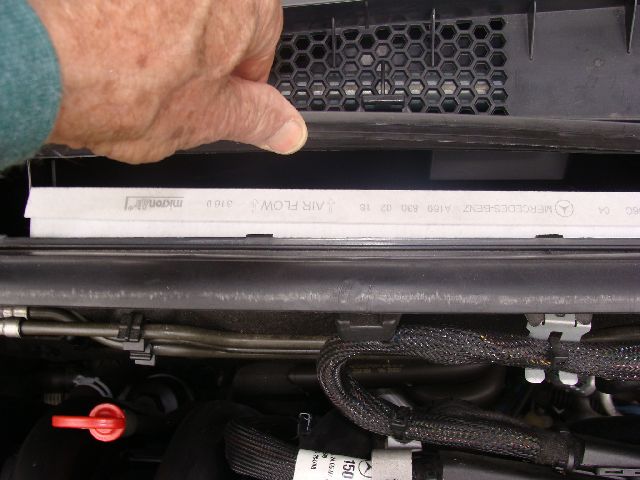
Procedure First raise the bonnet, locate the filter housing below the windscreen .
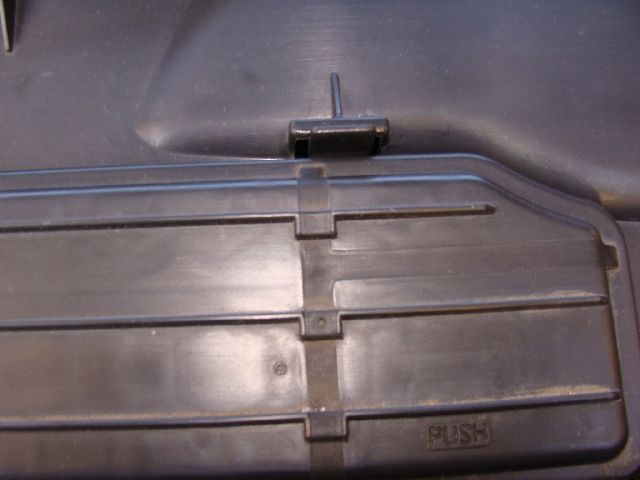
To replace the Filter remove the rectangular plastic cover by undoing the three retaining clips located on the top edge of the panel .
This will expose a flat black edge of the filter housing
Located at both ends is a clip which needs to be pressed firmly to release the top of the cover.
Once these have been released the top cover can be lifted, it is a moulded plastic hinge and may be stiff to operate .
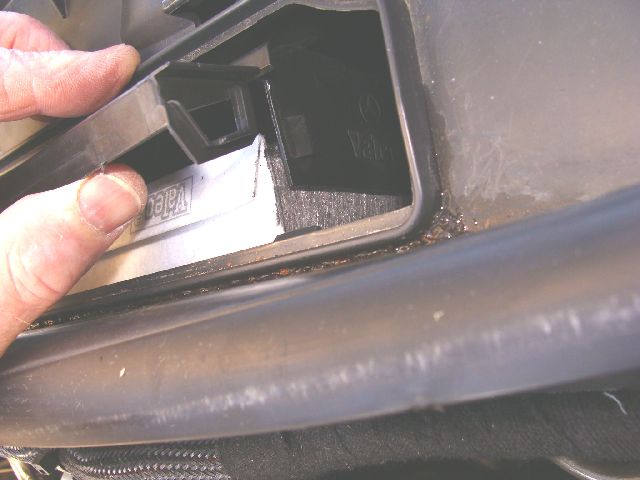
Open the cover sufficiently to remove the old filter
Having removed the filter check that the housing is clean.
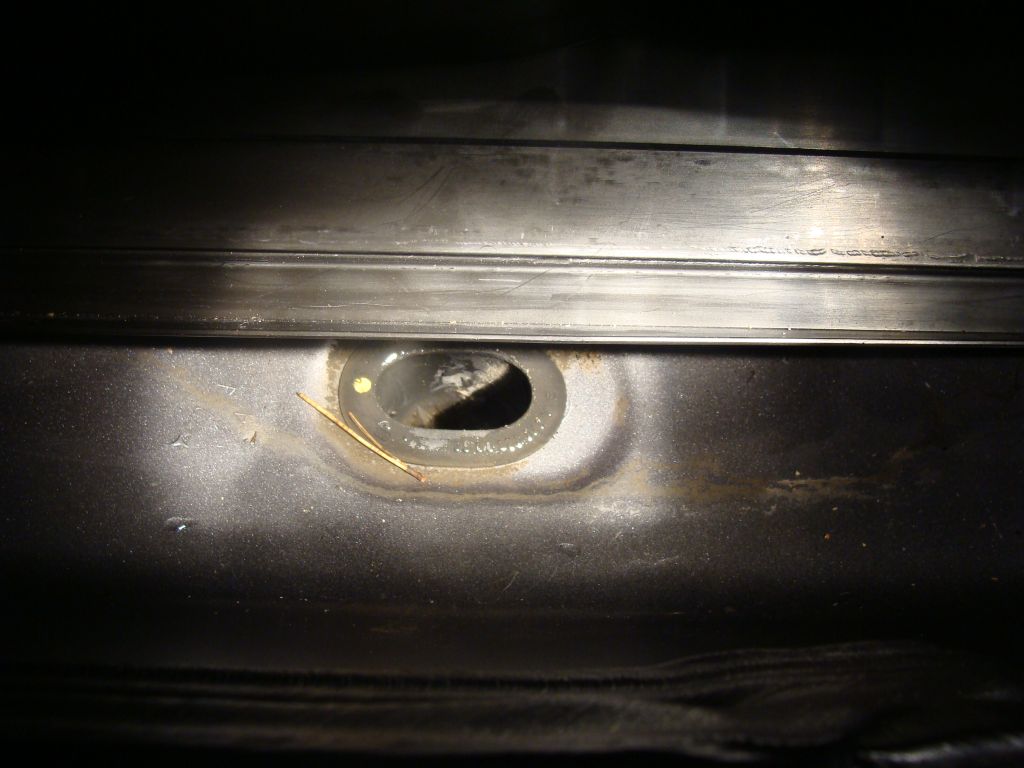
I found the best way to remove the accumulated dirt was to use a cloth on the end of a cane or rod, as my hands are too large to go into the slot, you can see the funnel grommet in the bottom of the filter housing. Take care not to push this out of position if cleaning.
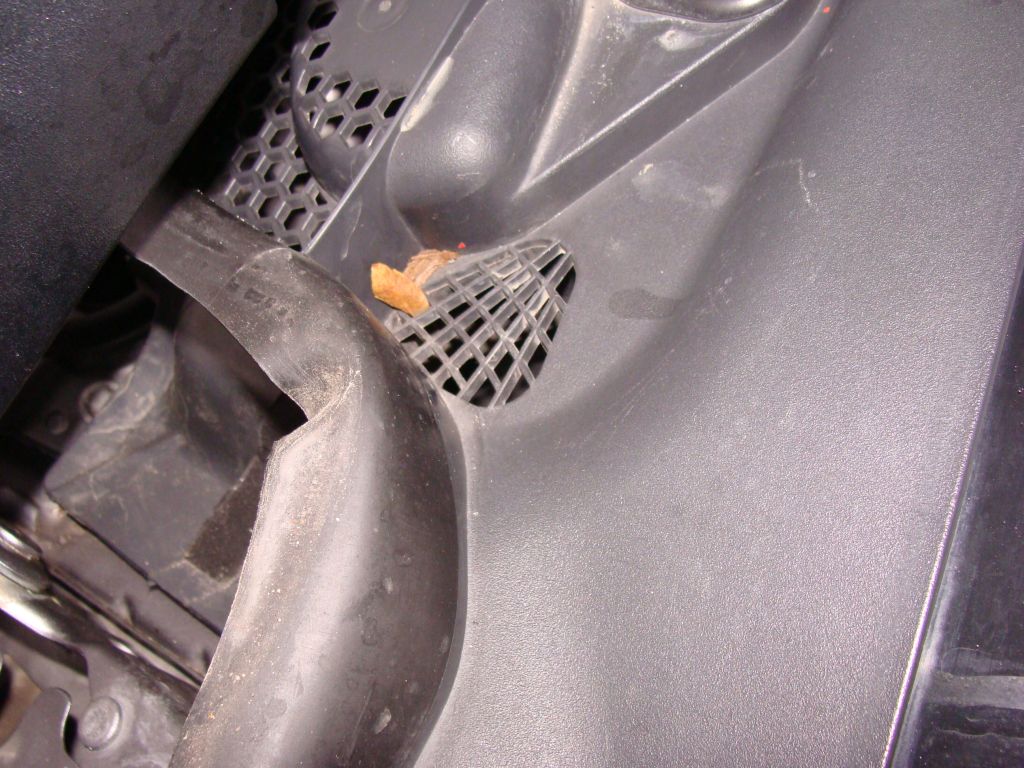
With the bonnet open, look screen side and also check the grills either side of the car for leaves etc If these are blocked the water off the windscreen will spill over the horizontal lip and flow into the carbon filter housing. If the filter housing funnel drain is clear it will cause no problems, if not your carbon filter will be damaged and water will eventually enter the car via the large box vent. (normally covered by the carbon filter.)
The bottom edge of the blower motor Vent is only 70mm above the base of the filter housing and drain plug so it does not need a lot of water to cause problems, water entering through this large vent.
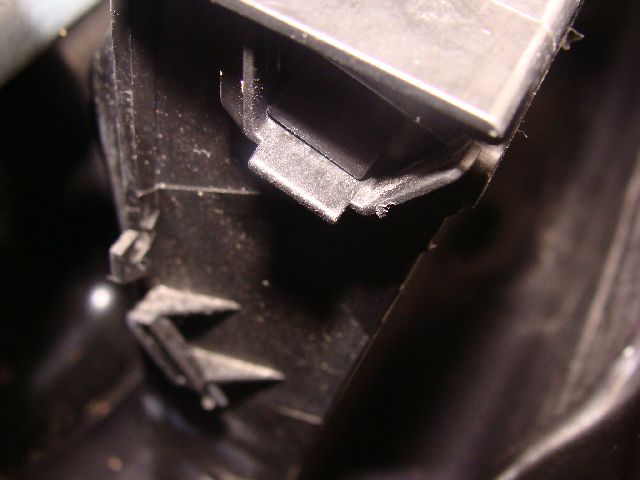
To ensure this drain valve is working and in not blocked, push a piece of polythene tube down through the centre of the rubber grommet that will ensure the flaps of the valve are not sealed by contamination. DO NOT USE metal objects or you will damage the rubber drain valve.
I also cleaned the groove at the bottom edge where the rectangular cover fits.
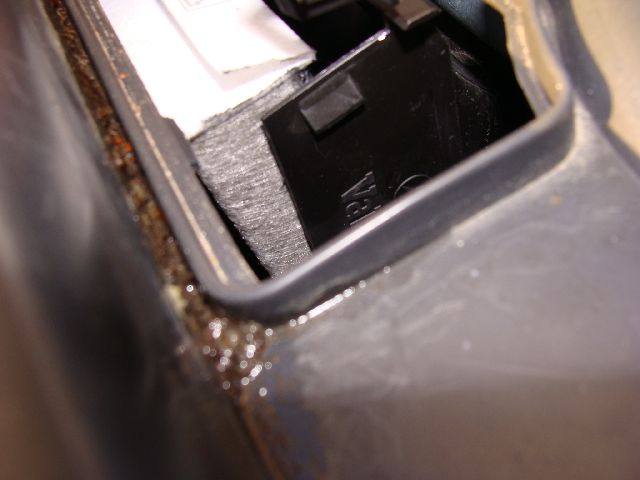
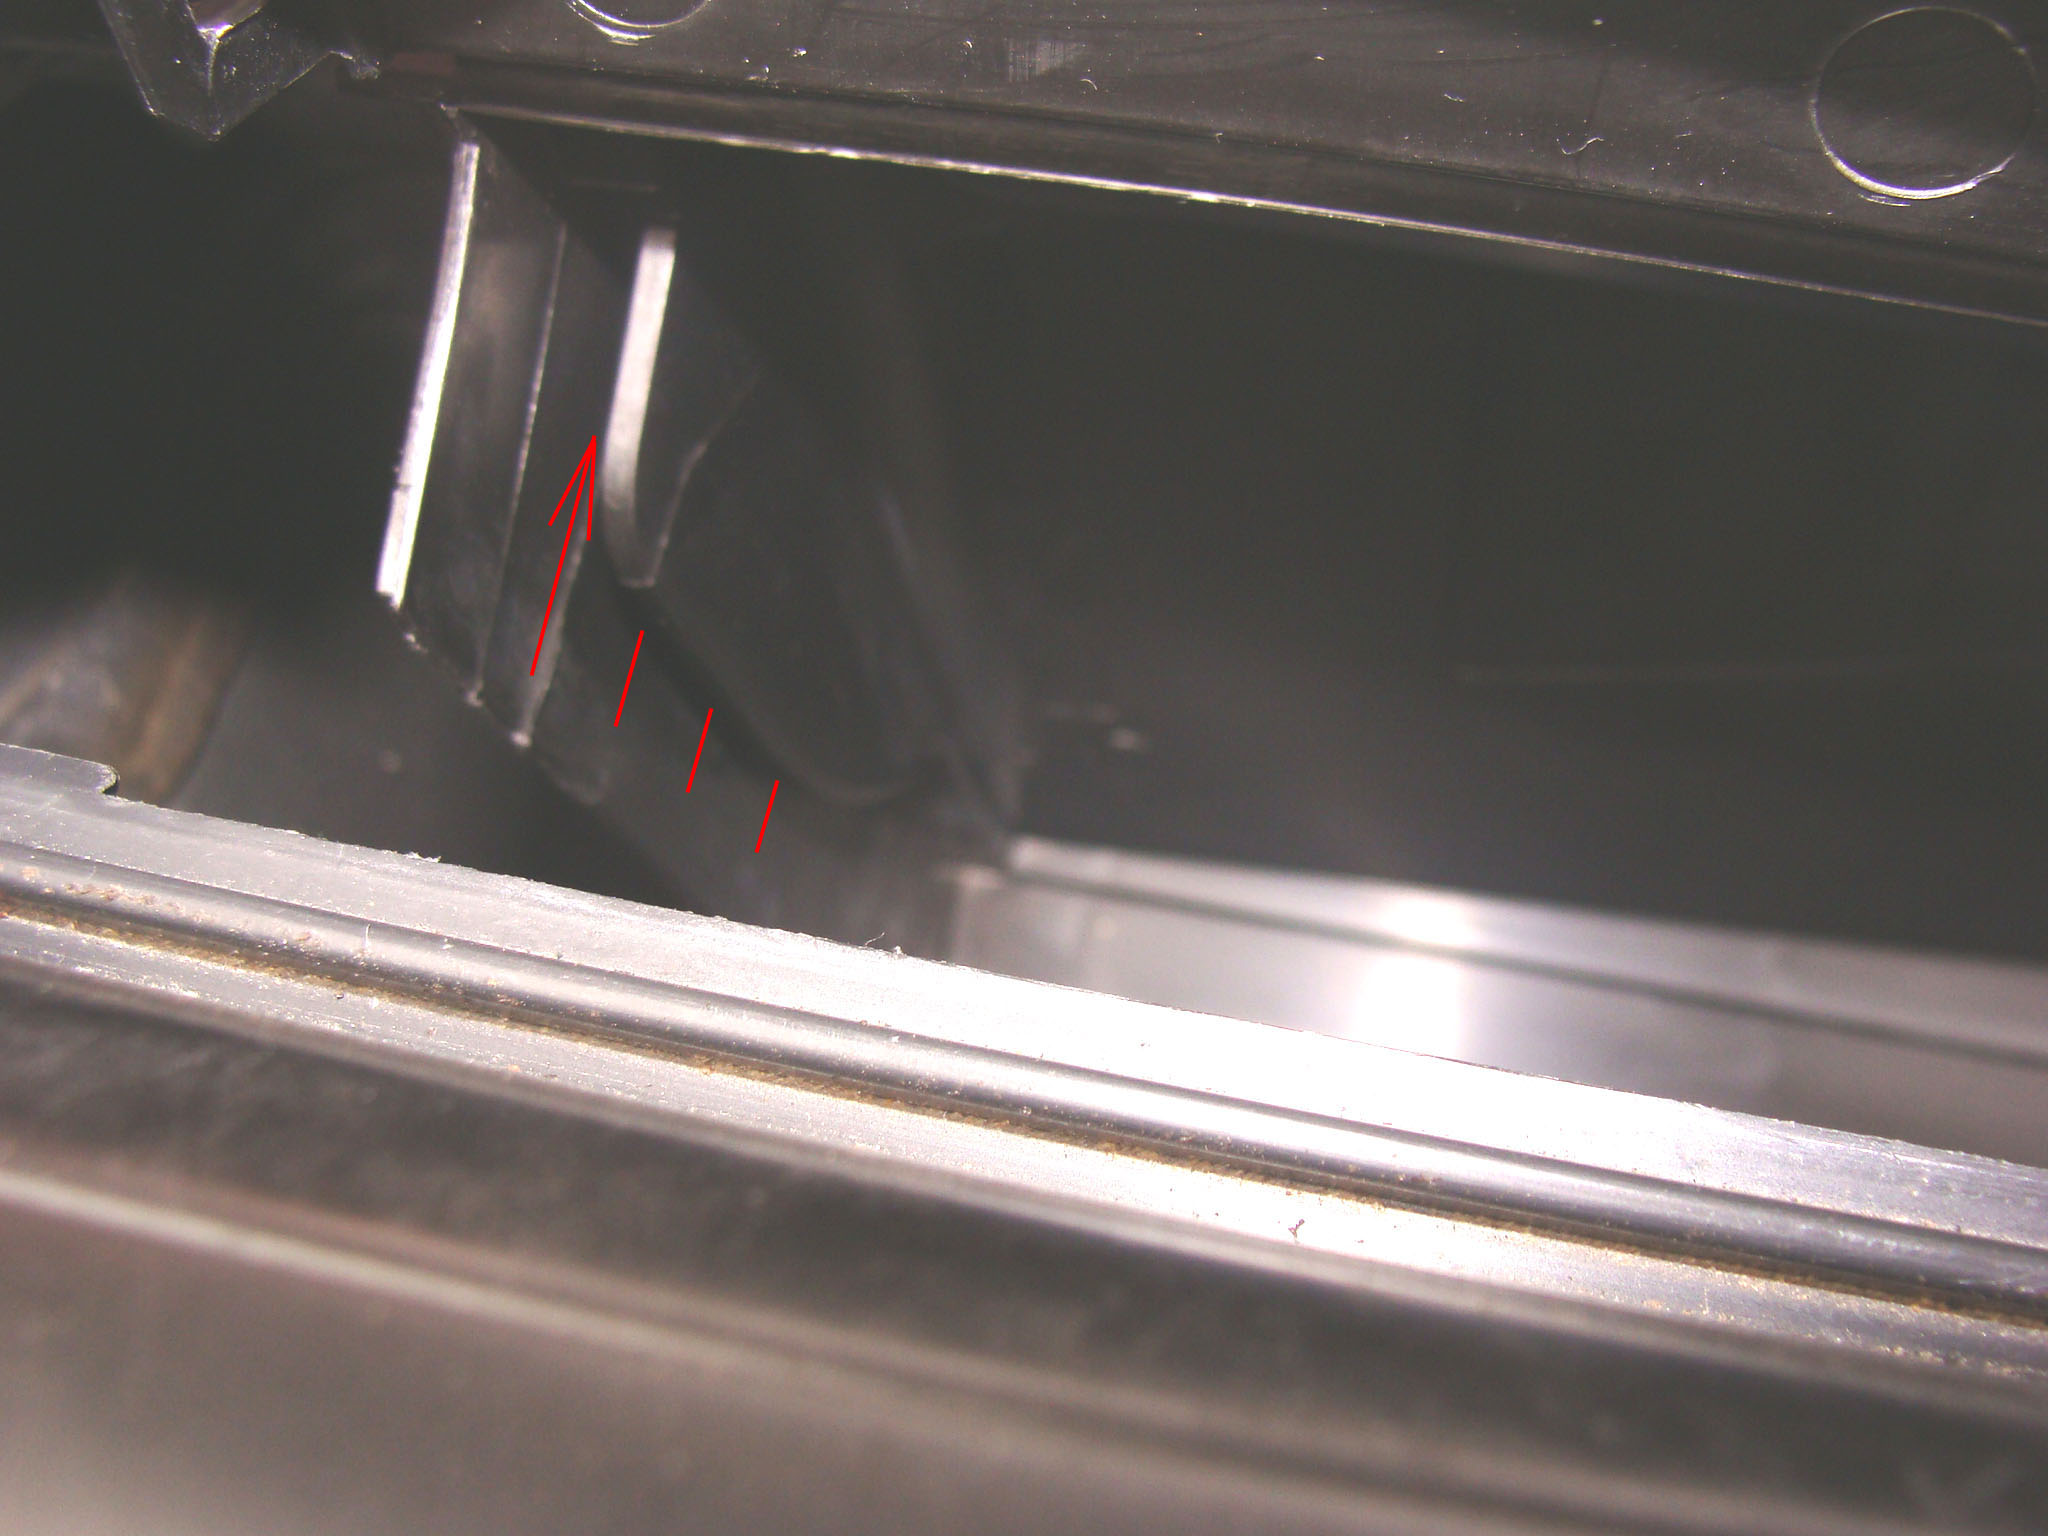
Before fitting the filter, note the construction of the rectangular plastic housing. situated either side is a plastic fin.
When correctly fitted the extreme folds in the filter will be supported, thus holding the filter when the hinged cover is closed.
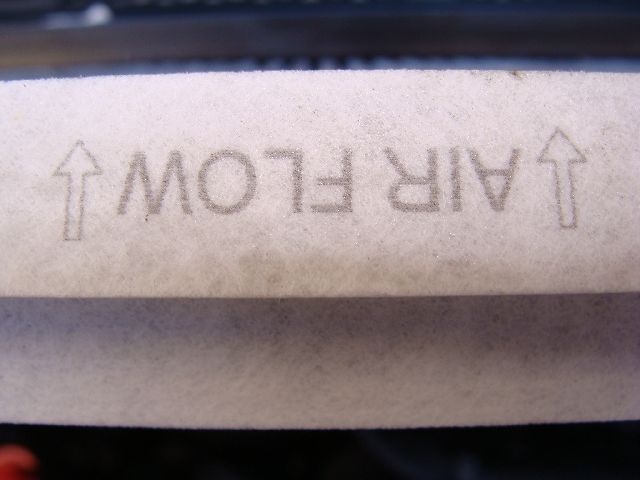
Note also that the filter should be fitted as indicated on the edges of the filter (Air flow ) in the case of this filter air flows from the front of the car towards the windscreen , ensure the new filter is fitted correctly I used a piece of flat baton to ease the bottom of the filter behind the plastic lip that retains it in position
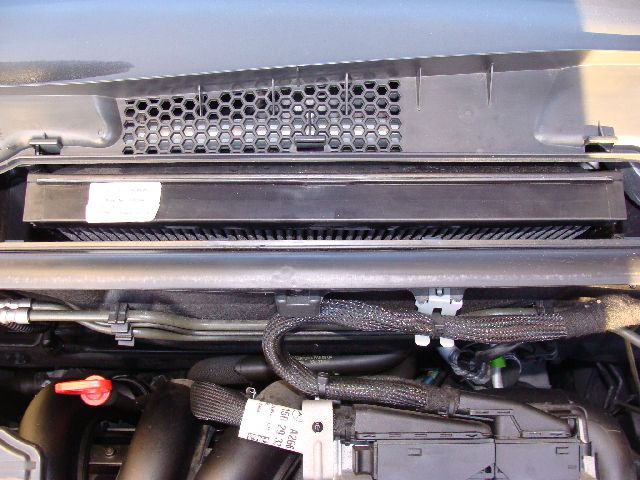
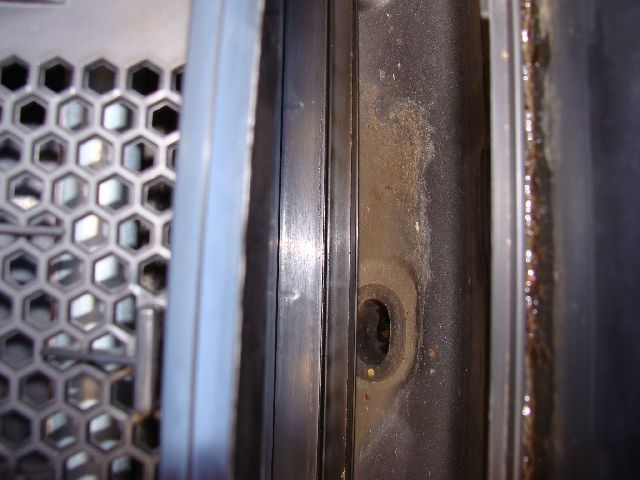
Special note When the filter is fitted correctly into its rectangular housing the water drain off facility can be seen by looking down the front of the filter If you cannot see the drain off valve then the bottom edge of the filter is not housed correctly.
You are looking for this water drain off valve.
It is quite obvious that when the weather is wet with screen washers in use ,water is getting into this area all the time , you will see that mine is wet and yet the car has only been standing out in the rain with one short trip, My advise would be to check this facility every couple of months during the winter period especially in the Autumn when leaves are falling.
Having placed the filter into the housing ensure the bottom edge is eased into towards the windscreen then push and hold the top back square with the housing, the filter should now be upright /square in the housing, holding the top of the filter in place, close the hinged cover, the two plastic side-clips should engage automatically.
Now position and close the rectangular cover, pressing down on the bottom edge first, then close the top two outside clips.
.
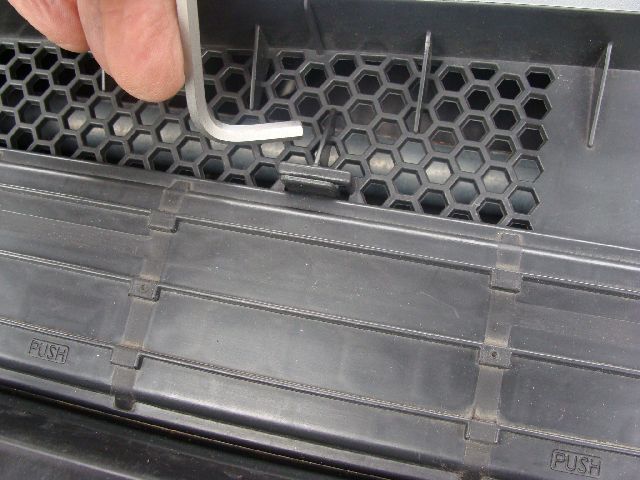
Note Due to the flexibility of the plastic grill you may find it difficult to get the middle clip to snap closed, water will enter unless the compartment is sealed To prevent damaging the plastic moulding I use an Allen key which I hooked through the moulding thus supporting it from the underside the clip closed as I gently eased the moulding upwards i.e. towards the rectangular cover.
Job done, remember to enter the replacement of the filter in your DIY records.
Severe dampness in car and misting of windows when turning on the heater .
I recently received an e-mail from Declan in Ireland who has had problems with very severe dampness in his W169 so much so that it was impossible to drive the car.
I attach his mail:- Hi Lofty just to bring you up to date re misting, found problem!
I should have caught it earlier, the drain pipe at the base of the particle filter housing in the centre of the bulkhead was blocked and water was running through the heater and into the carpet under-foam. I ended up with 3 inches in the battery box. Big dry up underway! Thanks for your advice. regards Declan.
So be warned with the weather conditions as they are in the world today, 7.1.14 you need to ensure that the drain holes either end of the dash are free of debris also the drain hole at the bottom the carbon filter housing, fail to keep these clear of leaves etc and you will finish up with a very wet interior of your car, which will cause as soon as you put the heater on cause very severe misting of windows etc making driving very difficult.
Don
a 'B' Class owner has now suffered the same problem, initially his resistor packed up causing the Blower motor to run at full speed all the time, Mercedes-Benz replaced this while the car was in for service and for a change did not charge the earth, but failed to notice or ignored the soaked carpets and foam backing which is almost certainly what caused the fault in the resistor, a few days later Don's car failed to start, his breakdown providers found that the battery box was full of water
Dried out and the car started, but inspection found that further water had found its way into the battery box.
When contacted Mercedes-Benz suggested that Don take the car into them for inspection which was of course going to be another bill with or without the fault being detected.
However he had the good sense to contact me before doing so.
The answer was the same as above water had flooded the carbon filter housing to such a degree that as with Declan's 'A' class W169 above, water had entered the interior of the car by running through the blower motor housing, eventually finding the lowest spot, Battery fuse compartment. Note that the layout on the W168 is different and this problem will not arise as with the 'B' Class and W169 'A' Class
Even if you are not currently suffering from Misting on start up with heater/blower working or wet carpets check your car, all owners can do it themselves there is nothing technical involved simply follow the instruction on this page it could save you a lot of grief and money, well worth the time.
All it cost Don apart from the grief and worry was a small donation and a New carbon filter plus a bit of work, he's over the moon at having solved the problem. He even at one point talking about selling the car! If you look at the photo on the right you will see that even the car I have, has at some point had this problem . I feel that I unconsciously cured the problem when I serviced and checked the car on purchase 13 months ago which included clearing debris collected in the area.
If you suffer this problem then do not be surprised if you get misting in the car for some weeks after the event as the interior carpets and foam backing need to dry out before the misting will stop. see also water in the lower boot area See page 8
.
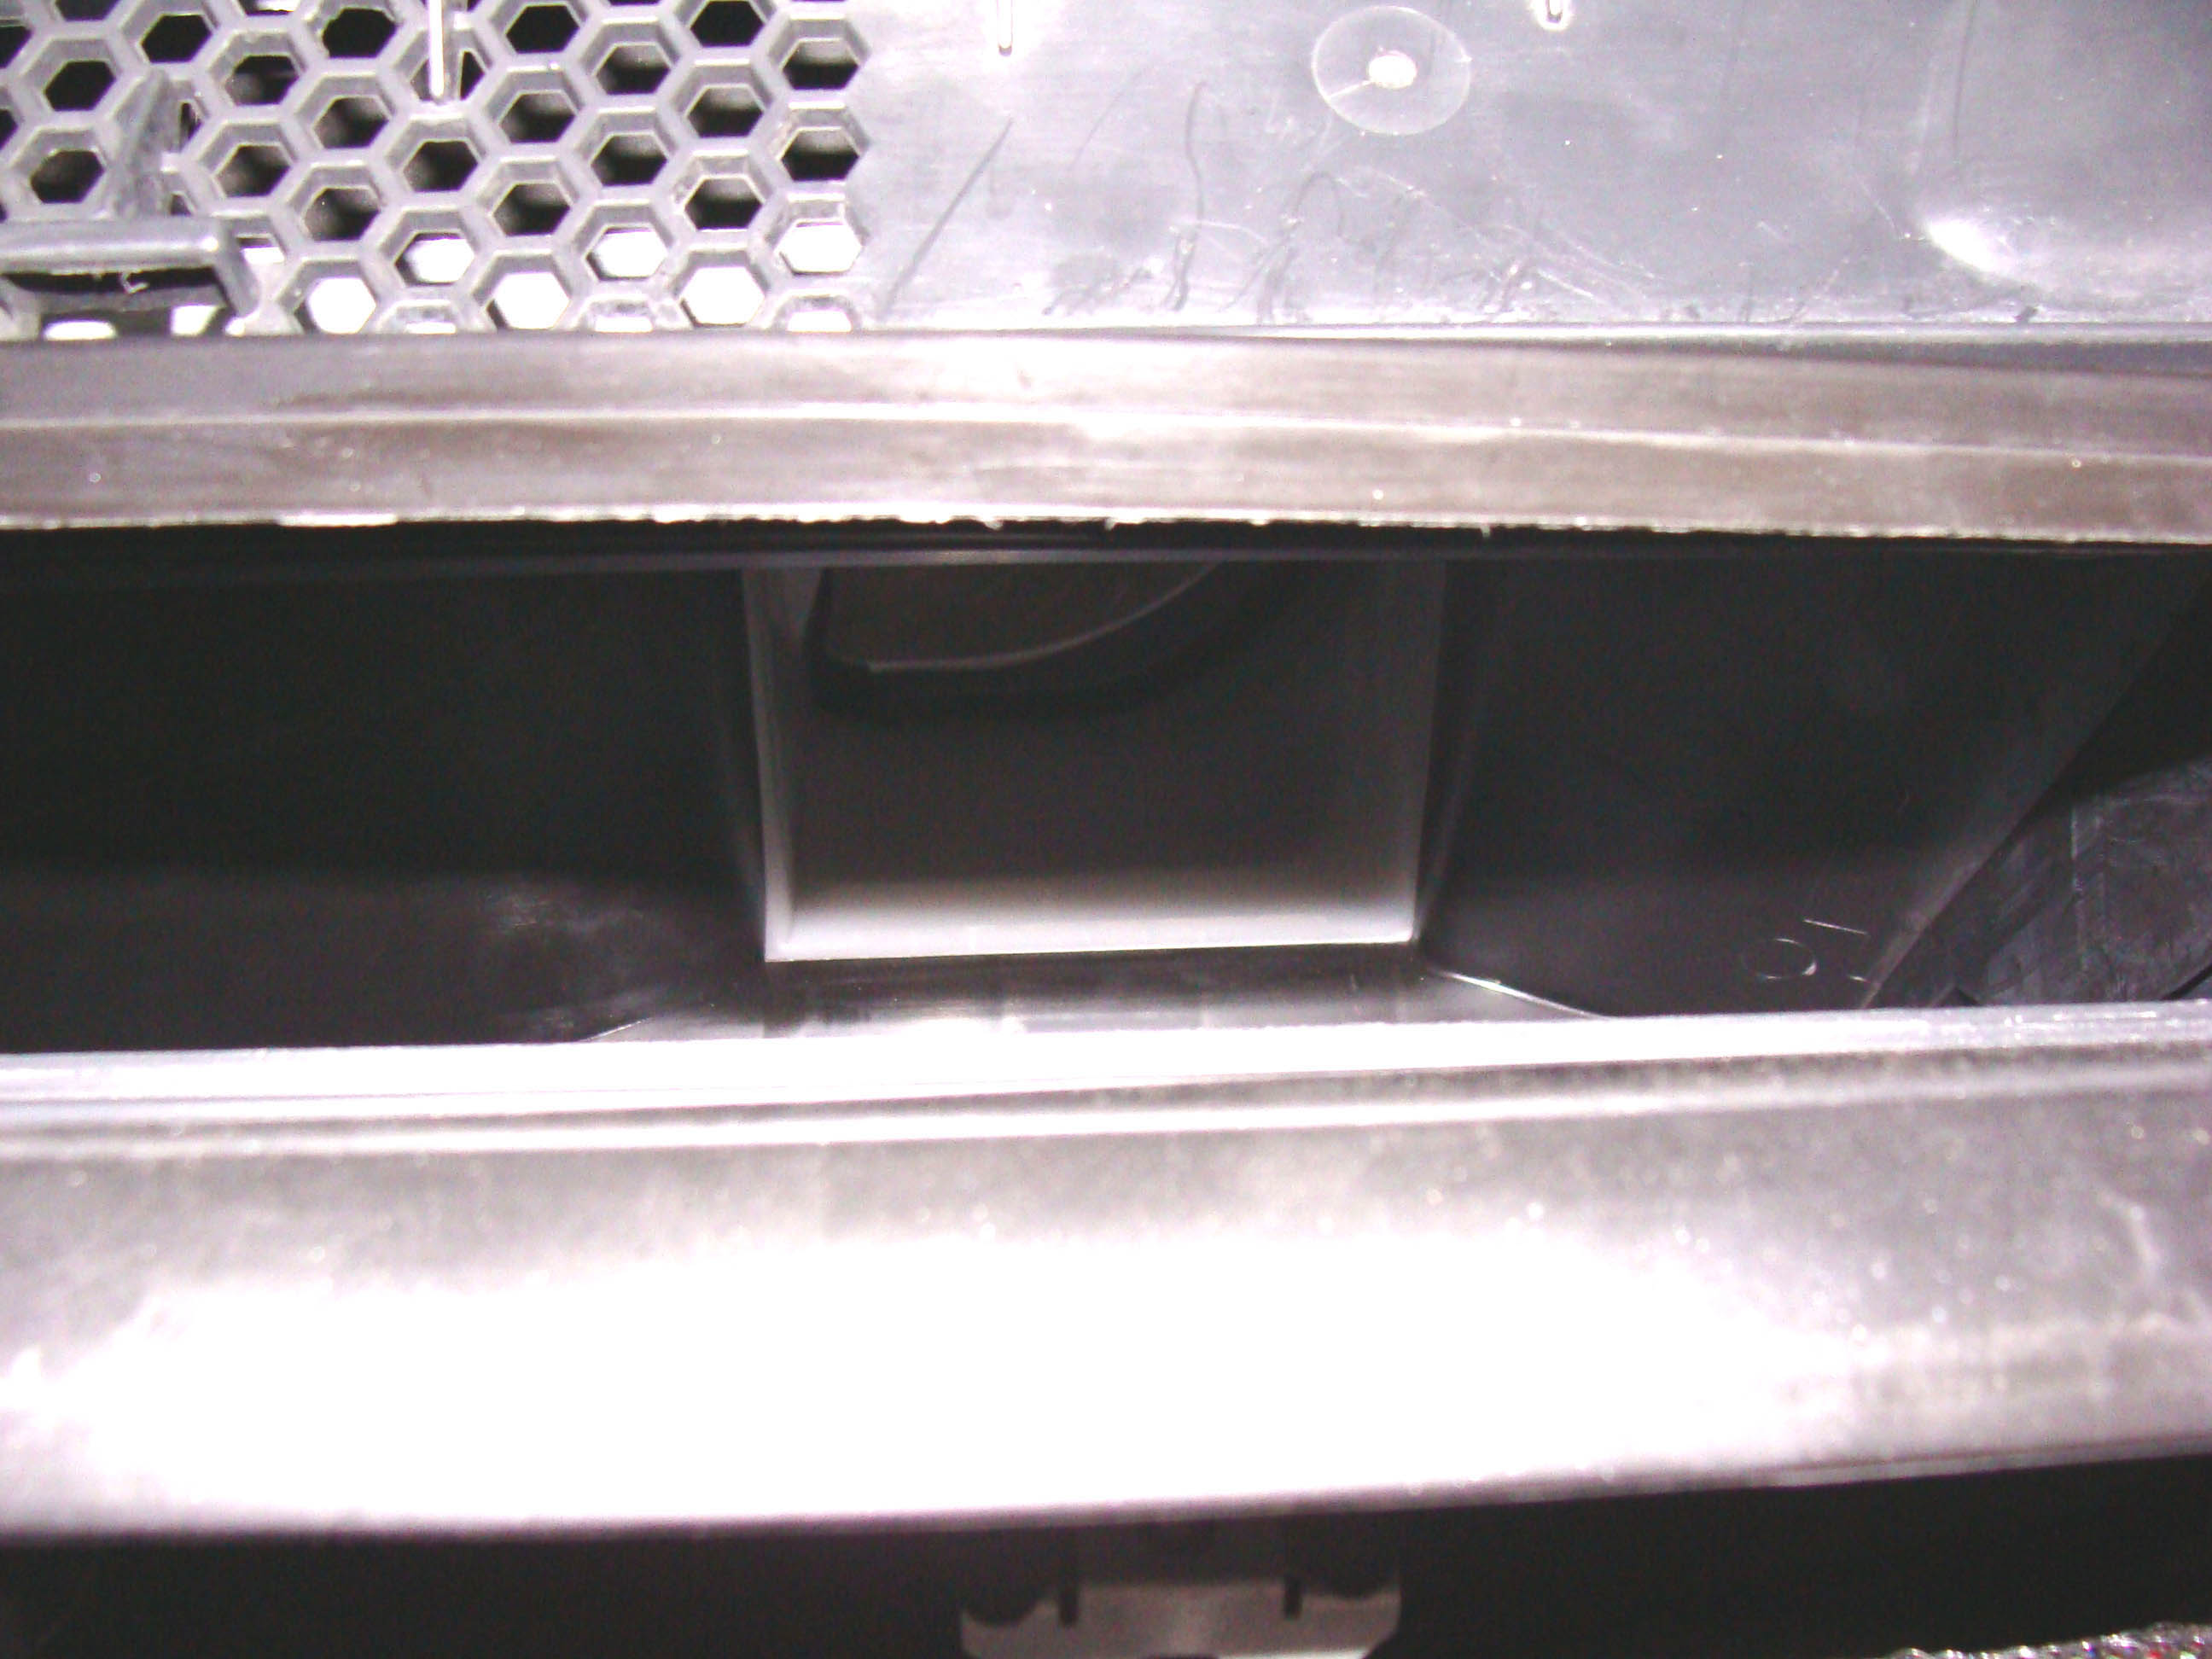 The bottom edge of the blower motor Vent is only 70mm above the base of the filter housing and drain plug so it does not need a lot of water to cause problems, water entering through this large vent.
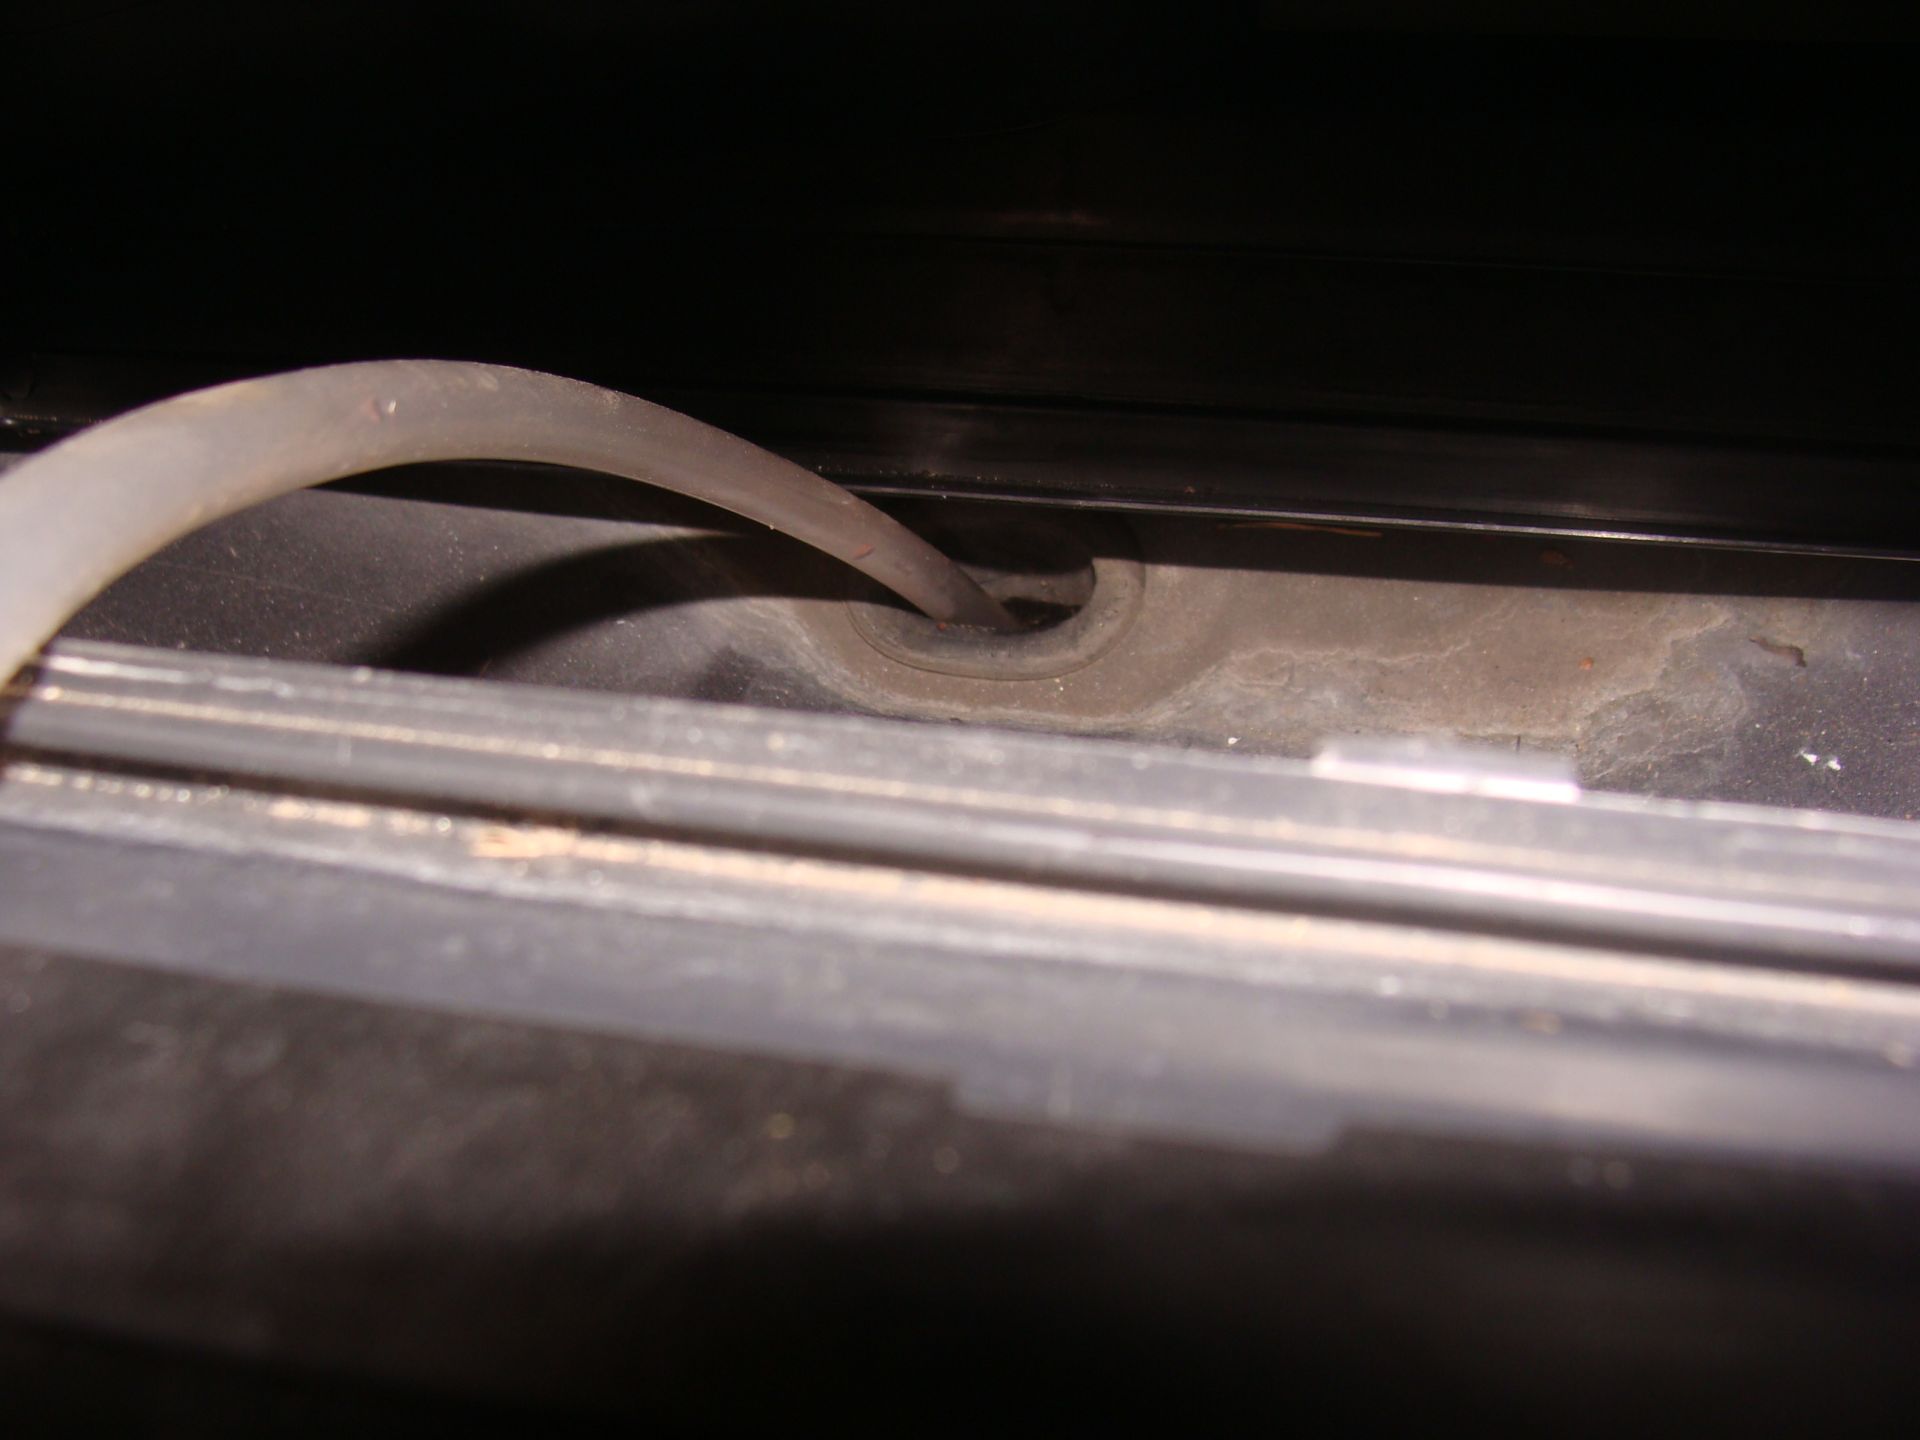 To ensure this drain valve is working and in not blocked, push a piece of polythene tube down through the centre of the rubber grommet that will ensure the flaps of the valve are not sealed by contamination. DO NOT USE metal objects or you will damage the rubber drain valve.

 Note
Note 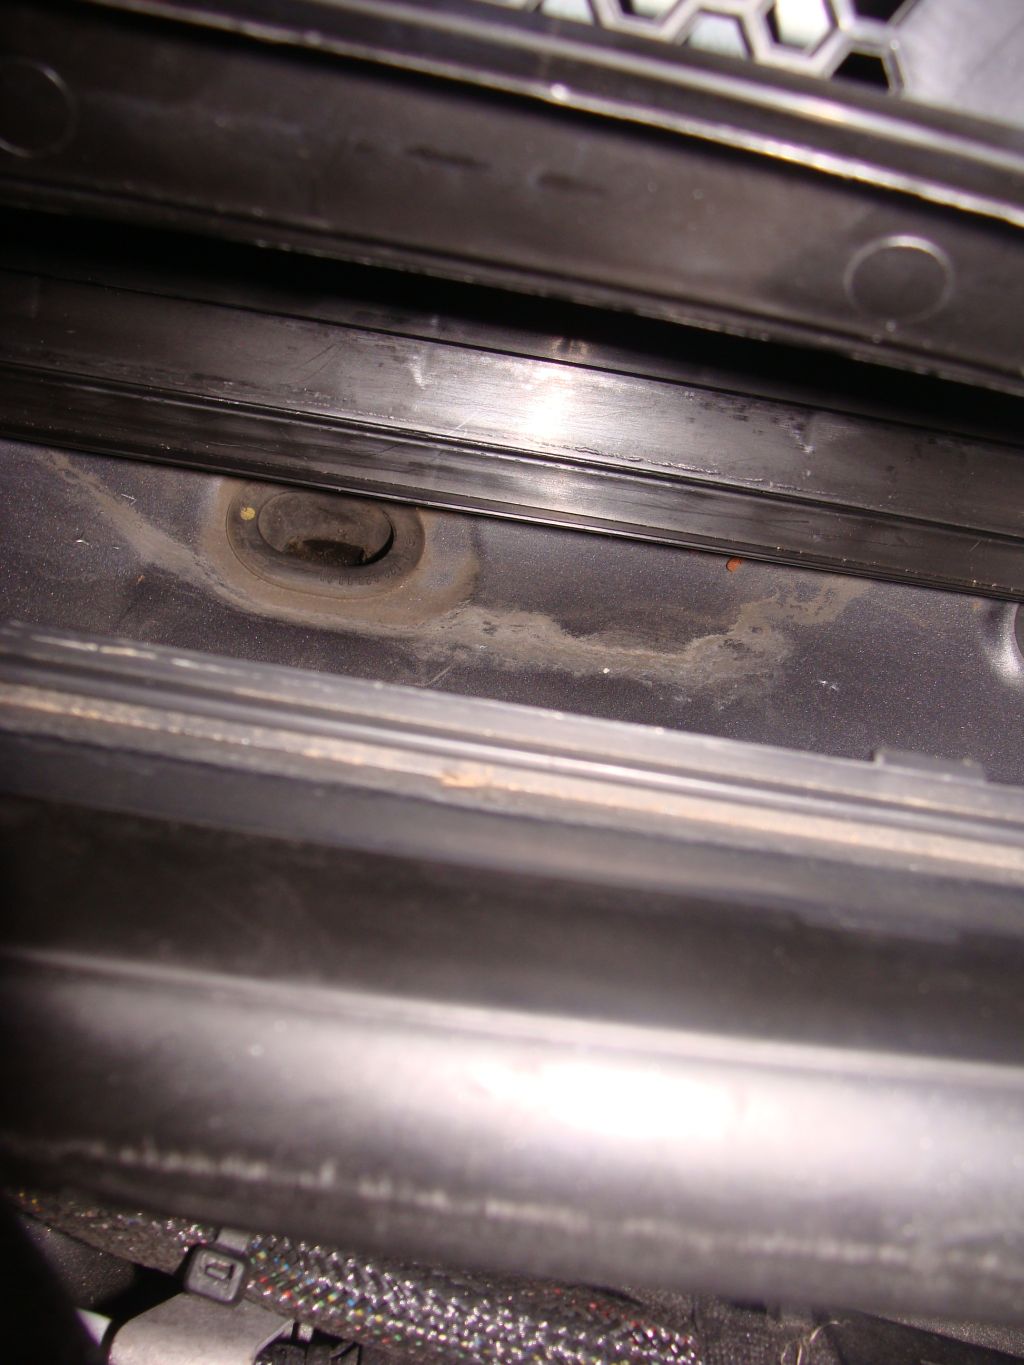 I attach his mail:-