When I received the e-mail from Solara indicating that he was about to service his wife's' A class I couldn't resist the opportunity to ask him to take some photographs so that other owners could benefit from his experience. I was delighted when he said he would, and even more so when he said I could include them on my site if I wished. Thank you Solara. So this page and the next page 30 contain some photographs and comments from Solara along with my own which I hope will enhance the detail, having now serviced my own car I'm aware that the information is correct and helpful.
It appears from what Solara has told me that he like so many Mercedes-Benz 'A' Class owners is totally disillusioned at the cost and standard of servicing, along with Customer Service dished out by his MB Distributor, his last 'B' Service having cost him in excess of £500!
The 'A' Class in question is a A140/2001 having clocked only 24k. The engine components being serviced are the same as the A160/2001 although there are some differences on the underside in that this A140 has not got Air Conditioning.
The service being undertaken covers some of the items covered on the Mercedes 'A' Class, 'B' Service but not all. Solara is fully aware that there are other checks and changes to make to his car but will no doubt carry these out over a period of Months rather than undertake them all in one go. As with all of the information on this site it is to assist and inform others, it is not intended as a comprehensive guide or detailed service schedule.
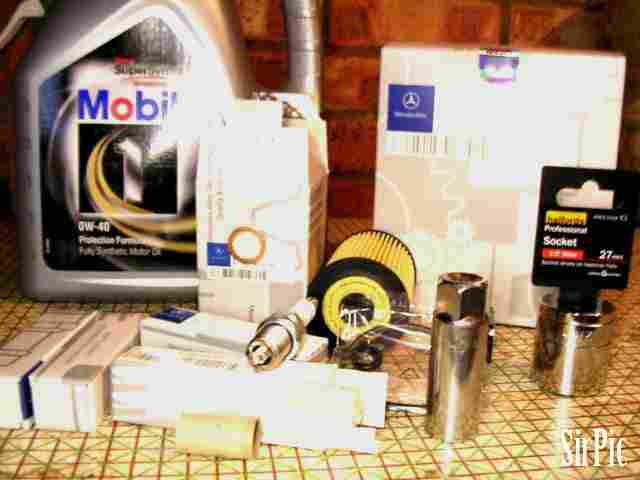
The items in the photo show the spares and items required to be available before starting the job, Solara assures me he got these from his Mercedes Stealership!! Having decided to do the job make sure you can do so with the utmost safety, particularly when working under the car. If in doubt KEEP OUT.
* Oil Filter (MA166 180 02 09) 20010360 £4.45 all prices plus vat(Dec 04/Jan 05)
* Oil Sump Copper Gasket (washer)(MN007603 014106/ROTO1B02) £.45
* sump plug, £1.35 .
* Air Filter (MA166 094 00 04 /20030340) £10.38
* 4 x Spark plugs (MA 003 159 75 03/26/ 20010260) @ £7.07 each(A140/2002)Check for A160/2001 see next page. Total with vat £50.64
In addition Solara purchased the following parts from Halfords.
* 1 X 27mm socket for removal of oil filter plastic cap@ £4.50 inclusive of vat
* 1 X 10mm to remove and fit spark plugs @ £3.50
*Plus Mobile Fully synthetic 0W/40W Engine Oil @ £35.00 Total £43.00 albeit the sockets will only need to be purchased once. The total cost of consumables was therefore £85.00.
* You will require a few other small tools which will be mentioned as we progress & and which if you have been used to working on cars will have in your tool box, as well as a suitable container for your old engine oil, remember to dispose of oil & contaminated filter responsibly.
"At my last service Mercedes used Mobil 1 10W/40W semi synthetic. I believe Mobil have up rated all their oil specs, 0W/40W is actually higher spec, better at colder temperatures. You will probably need 4.5L so get extra 1L bottle and keep for top-ups".
If using Mobile.1. Note that the colour of the oil is much blacker than Castrol GTX and other oils, one could be forgiven for thinking that the oil had already covered a couple of thousand miles, or indeed had not been changed on the 'A' or 'B' when serviced by your garage
Cheaper oils are available but are not recommended by MB.
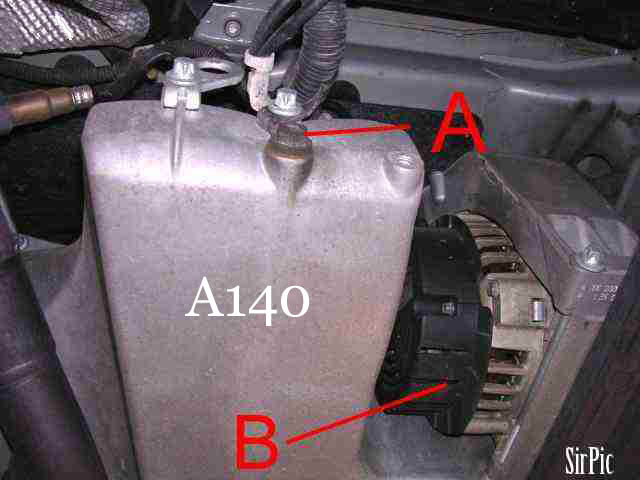
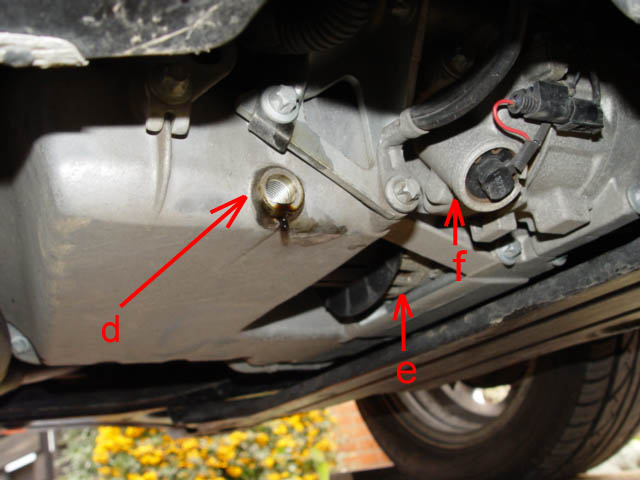
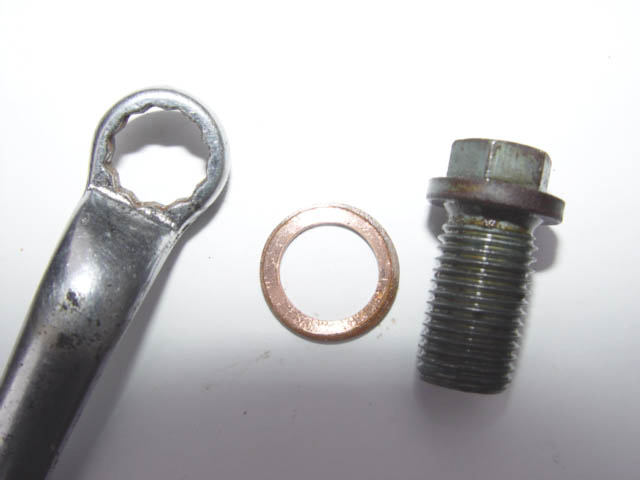
This is the pit view of the sump & alternator (A140/2001) The sump plug, is a standard 13mm hexagonal bolt fitted with a washer. The copper washer is not the compression type, so you can probably get away with using it multiple times" (just keep it faced the same way).
Note, the easily accessible alternator, not tucked in behind the Air Conditioning compressor as with the A160/2001
There are slight differences between the 140 & 160 but the sump plug remains the same, note the extra bracket on the A160. I haven't worked out what it is for yet, may be to do with the Air con fittings?
The engine oil drain plug is located on the back end of the sump , It is not covered by any under body protection on this model the hexagonal nut size is 13mm although I found a 1/2 socket to be a far better fit. Undo anti clockwise.
Having allowed the sump to fully drain ,replace the refit the drain plug; hand tighten initially to prevent cross threading
Take care as the sump appears to have been made of alloy material, the plug is steel, the last thing you want is a damaged sump drain. (if you have removed the sump plug previously and found it to be damaged or worn then it pays to get one even if only to retain as a spare Part Numbers Sump plug A1119970330 Copper sealing ring N007603014106 this does not want changing on all oil changes but it is wise to have a spare to hand when changing your cars engine oil)
Having replaced the copper seal as necessary and fitted the drain plug torque to 30Nm
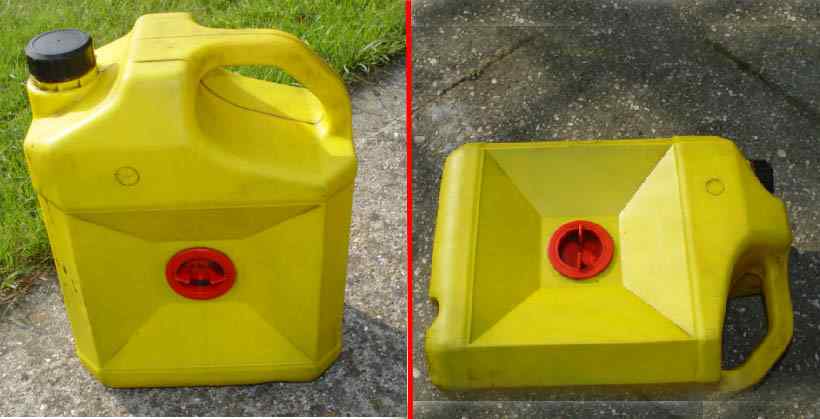
If you are draining your own oil, special cans can be purchased that make the job easier, a 5 litre min can is required as the sump holds 4.5 litres.
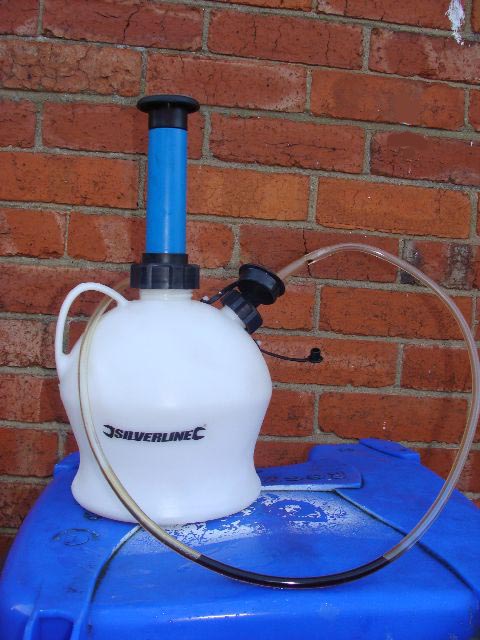
Or better still purchase a hand operated fluid extractor (Vacuum pump) I purchased this one off E-Bay UK simply search for:- 4L syphon pump fluid extractor,
This will enable you to change your oil completely without having to get under the car. I purchased this one because the 'Smart' Car my wife drives does not have a oil sump drain plug, this pump is powerful enough to also remove the sludge.
However to make the job easier always change the oil after a good drive when you will find the oil warm and more fluid (thinner) This unit cost £20.00 including delivery , it has a life time guarantee and hold 4 litres, it is easy to empty when full and does remove sludge. It comes with two syphon tubes one of which is suitable for the 'A' class dip stick location hole.
Always dispose of used engine oil in a responsible manner.
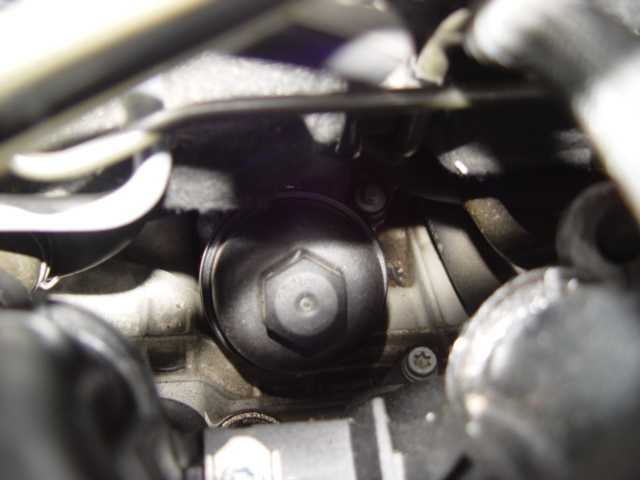
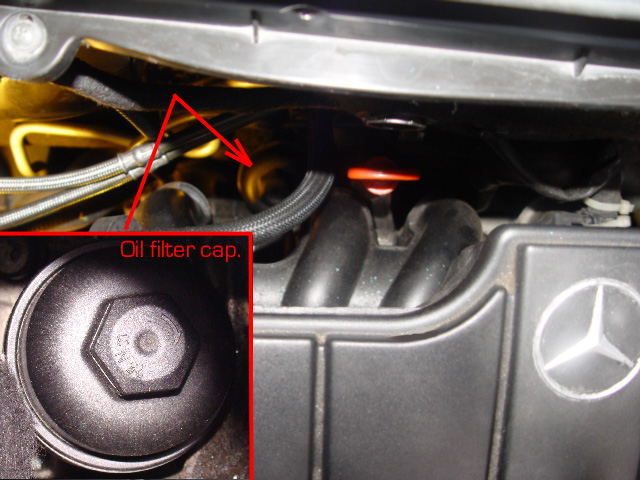
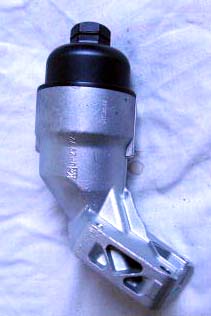
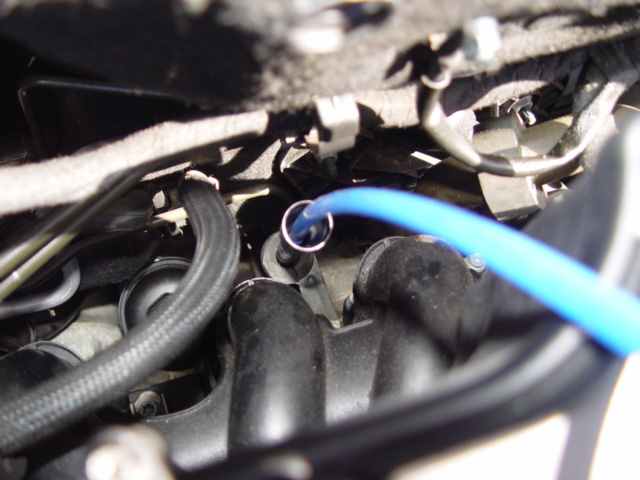
The Oil Filter With the bonnet lifted, look down to the rear of the air filter housing, just left of oil dip stick, about 12 inches down you will see the black plastic cap of the oil filter cap, the black 27mm nut built into the cap is used to remove the filter cap which will allow you to then remove the old filter , have plenty of rag available to catch the old oil drips.
It is normal practice to remove the oil filter from its housing after draining the sump. This allows any oil in the filter to drain into the sump and not remain stored in the filter; however you would be well advised to have a python bag to drop the old filter straight into as oil engine oil will contaminate every thing it touches.
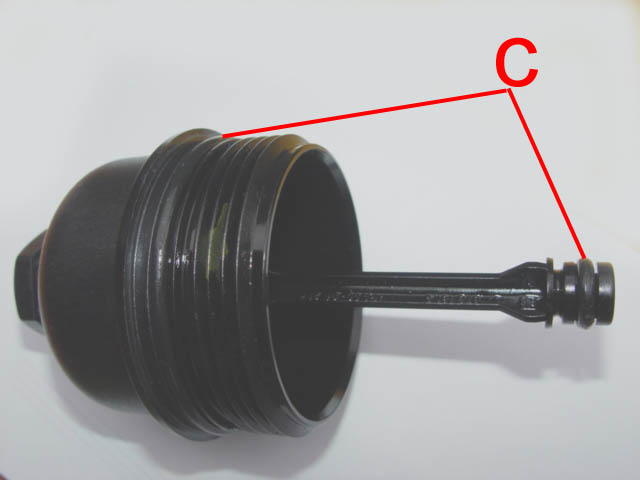
"To remove the oil filter you will need to use a long extension socket bar, with a 27mm socket.(If like me you have two shorter interlocking bars then they will do the same job) Once the filter is unscrewed, pop it out with a pull. Then clean it and replace both rubber 'O' Seals. Push in the new oil filter and you are ready to screw back in, I lubricated the copper Seal with a smear of oil.
When re-placing the plastic cover,
take extreme care not to cross thread,
Start the cap off by hand there is just enough room to work, push the filter housing down firmly ensure its square and screw clockwise. it is advisable not to use the & bar until you are sure the cap is engaged correctly and screwed home a couple of complete turns. Torque to 25Nm
max.
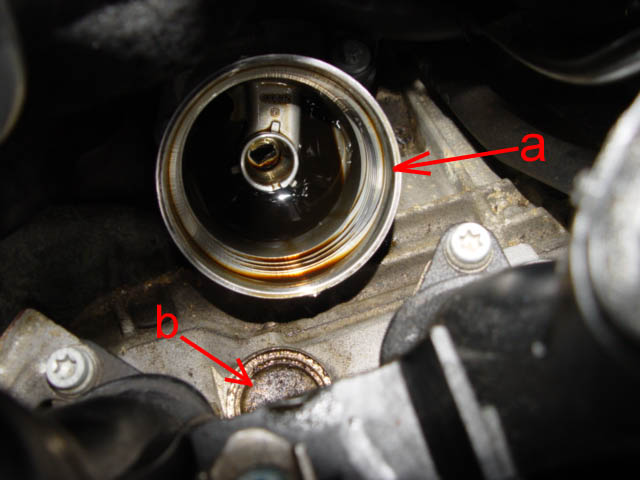
a
The black cap unscrews, beware when re-fitting not to cross-thread as it is only plastic, start off by hand, Shows the oil filter removed,
b
points to one of the core plugs situated in the block.
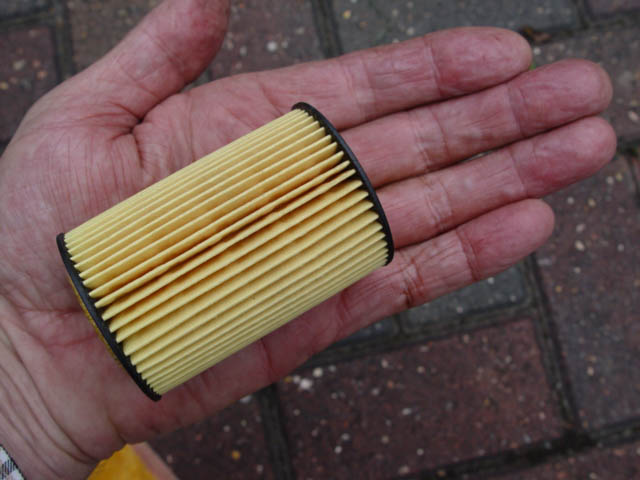
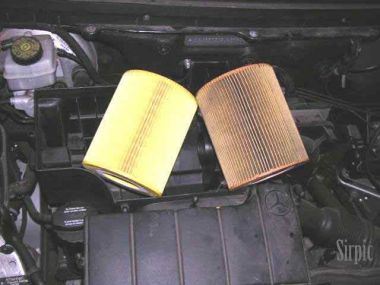
Here's a comparison between the old and new oil filter. The old/used filter has only been in the car for 4500 miles and as can be seen is not dirty.
This really is a mini filter, or my hands are very large?
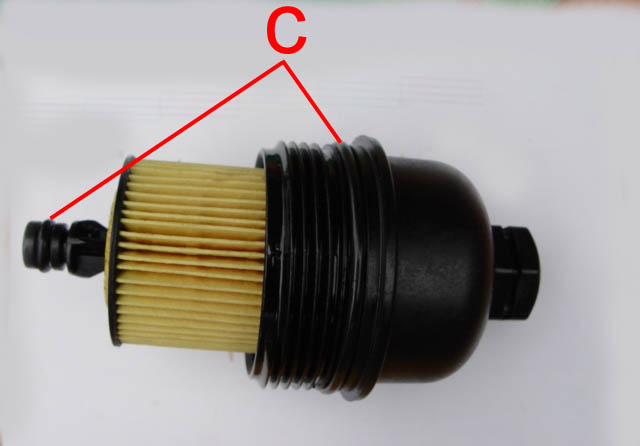
c Shows the location of the 'o' seals
which should be changed on every occasion that the filter body is removed.
Sump capacity 4.5litres. DO NOT OVERFILL
If the engine sump is overfilled and indicator will show on the dash along with and audible warning the letters HI will appear. If this occurred just after a garage service as is more likely you are advised to return the car to the garage and ask for the level to be corrected. BUT first check the oil level using the dip stick while the car is on level standing & after the engine has been stationary for at least 5 minutes. IF you overfilled it, use a length of windscreen washer tubing ,insert it down the dip stick hole into the sump and siphon the overfill out. The warnings will then cease. Re-check the oil level on the dip stick, it should not exceed the MAX. The tube must be long enough to enable to oil to siphon, i.e. the tube end must be lower than the oil in the sump to siphon, or use a suitable vacuum pump as shown above.
Poly 'V' Belt Inspection
(Located on the off side of the engine) While you are under the car is an appropriate time to inspect the poly 'V' belt which plays a very important roll on the 'A' Class proving propulsion to the Water pump, alternator, and air conditioning compressor if fitted.
It is worth checking the rubber/composite belt for wear ,cracking and general condition.
In addition it is worth checking the pulley's for damage, albeit space is very tight. For more information go to page 57.
Remember your service will not be complete without inspection of the belt!
Air filter
By my reckoning Solara's A140 was not due for an air filter for another 13 months, it is only required to be changed by MB every four years. By the contaminated state of the filter being removed it would have been blocked by that time, almost certainly causing the car to run rich thereby burning more fuel than necessary. There is also a concern that the state of the filter could cause the car to fail it is emission test during it is first MOT, due in February 2005, as recently happened with another baby-Benz owner, although the cause for his car failing isn't known at this time. A partially blocked filter would certainly not help the situation, and in my opinion the air filter at just over £10 is a good investment and should be replaced on at least every 'B' Service, or average of two years 20,000 miles. My car is the same age as Solara' and was serviced in November 02, mine has done 28,500 miles and all I have done it blow my filter off with an airline, and it is still relatively clean. If you have doubts about the quality of service you are getting from your Garage, then the air filter and state of the oil when you pick the car up following service are a real indicator and are the easiest things to check but do bear in mind the air filter is only changed every four years according to MB's service schedule. Solara replaced the air filter, not to be confused with the activated carbon/pollen filter installed on 'A' Class with Air Conditioning, See mypage.23. which is changed on every 'B' Service. For further details in changing the air filter, see mypage.16.
Solara completed his Mini Service by checking his Battery.
Its no good re-placing the plugs & filters if the battery flat. For tips on Battery servicing
go to mypage 3 or link direct to an article I produced for the Baby-Benz. Owners club, baby-benz.com (Mercedes 'A' Class Owners club) General observation
It is fully appreciated that all fittings Bolts nuts etc on this car are metric, however I do not intend buying new tools, spanners etc, where imperial tool sizes are an exact fit, like my 1/2" ring spanner on the sump oil drain plug. It the case of star (Torx) drive screws, if star (Torx) drive sockets are not on hand a well fitting 8 point ring spanner can be used.
 Servicing 'A' Class/Engine Components
 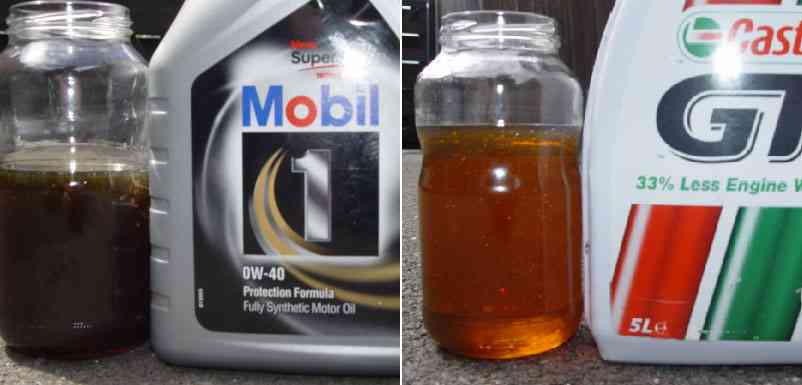 If using Mobile.1. Note that the colour of the oil is much blacker than Castrol GTX and other oils, one could be forgiven for thinking that the oil had already covered a couple of thousand miles, or indeed had not been changed on the 'A' or 'B' when serviced by your garage
Cheaper oils are available but are not recommended by MB.
If using Mobile.1. Note that the colour of the oil is much blacker than Castrol GTX and other oils, one could be forgiven for thinking that the oil had already covered a couple of thousand miles, or indeed had not been changed on the 'A' or 'B' when serviced by your garage
Cheaper oils are available but are not recommended by MB.
 This is the pit view of the sump & alternator (A140/2001) The sump plug, is a standard 13mm hexagonal bolt fitted with a washer. The copper washer is not the compression type, so you can probably get away with using it multiple times" (just keep it faced the same way).
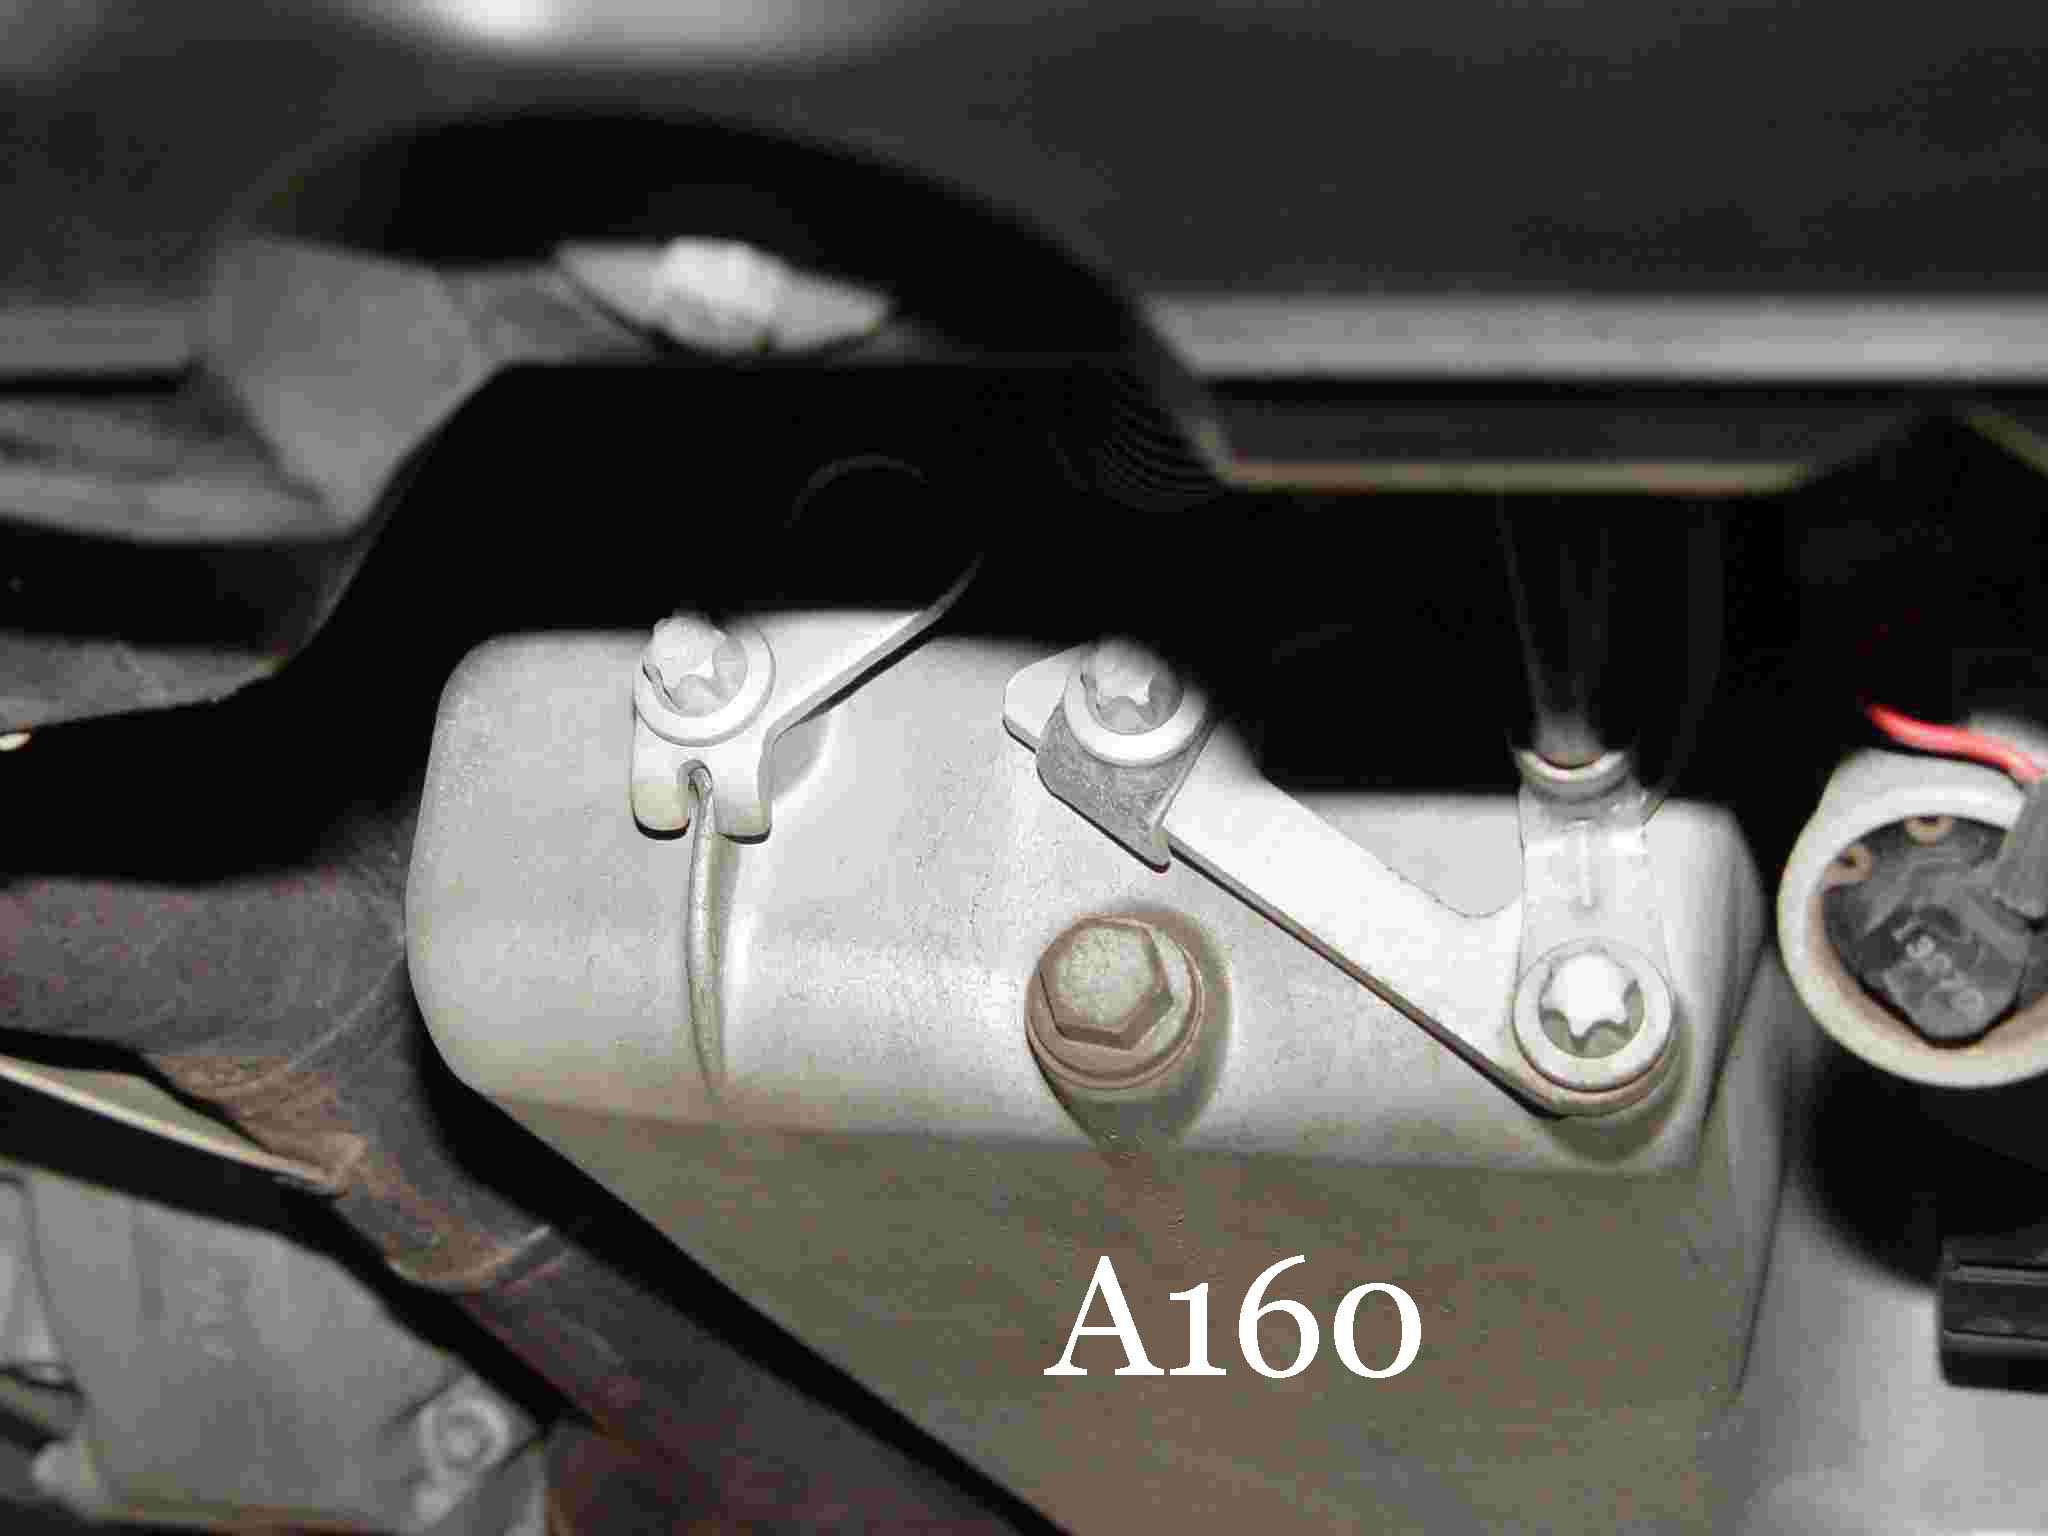
 The Oil Filter
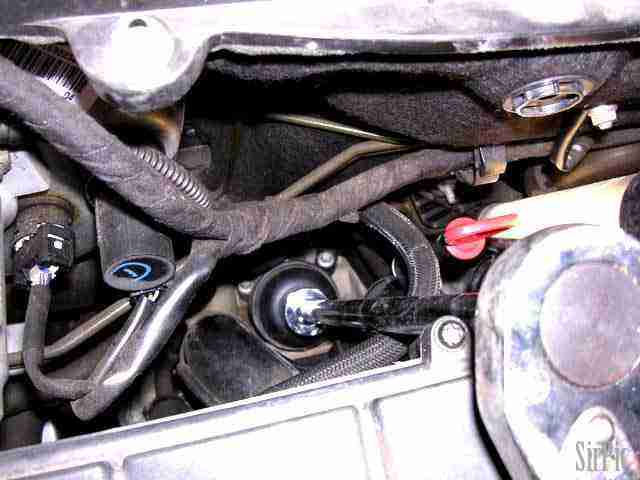

 If the engine sump is overfilled and indicator will show on the dash along with and audible warning the letters HI will appear. If this occurred just after a garage service as is more likely you are advised to return the car to the garage and ask for the level to be corrected. BUT first check the oil level using the dip stick while the car is on level standing & after the engine has been stationary for at least 5 minutes.
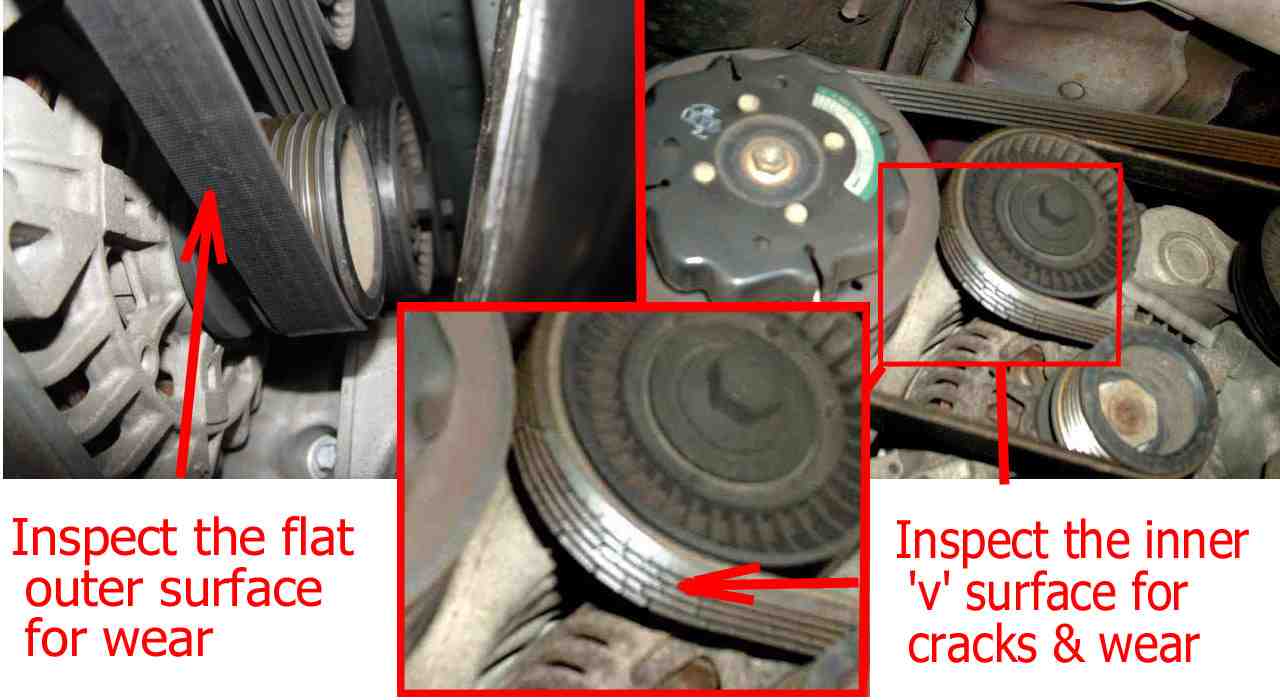
 Air filter