There are several threads on forums about how to do this job but few answers.
One web site, www.mbclub.co.uk suggests working from the top of the engine rather than working under the vehicle, however my arms are too thick to follow this suggestion without creating more space.
Mercedes-Benz advise working from under the car but that could be because they would have good access to high lifting equipment which is convenient and provides a safe working environment . The way I have done it is from the top of the engine bay I would recommend reading through this information before starting work. Only tackle the job if you have the correct tools and feel sufficiently confident to do it. Yes you will save the labour costs by not having the work done at a garage but it may cost you more if you do not know what you are doing!
Procedure
To create space and thereby enable you to be able to change the plugs two components have to be removed from their housed locations. 1.The screen fluid washer container and 2. Air filter housing complete.
First, remove the windscreen washer container/reservoir.
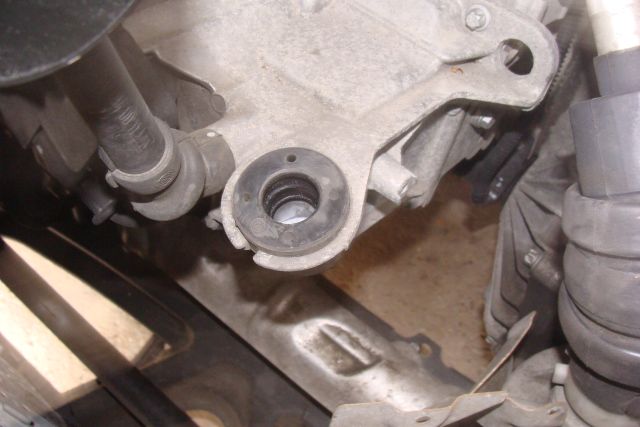
Undo and remove the yellow securing clip Lift the reservoir/container and lay it to one side. ensure there are no water leaks onto the ESP/ABS module below. You may decide to syphon the fluid from the reservoir and remove it from the car, if so then do this before undoing and removing the yellow securing clip
If you have emptied the container raise the container and pull the small pump from its housing, once withdrawn the container can be totally removed, the pump is only pushed into the container through a rubber grommet, make sure the rubber gasket is in place before re-installing.
Now release the reservoir. This is done by twisting the yellow locking clip. The securing clip can now be removed. If tight Push the yellow locking clip in firmly this will make it easier to turn and remove. If using pliers or grips take care not to break the securing clip.
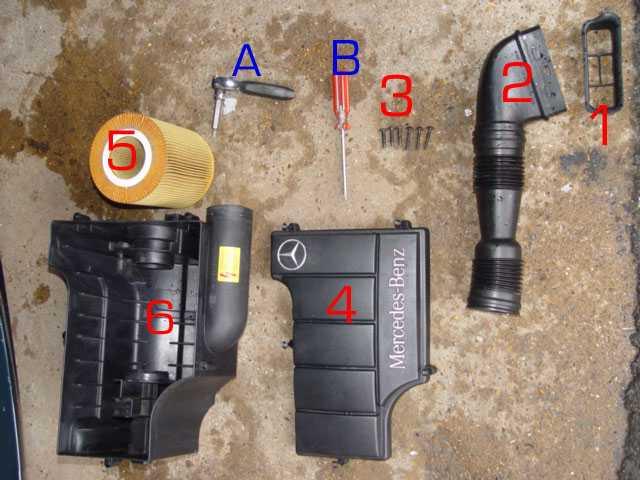
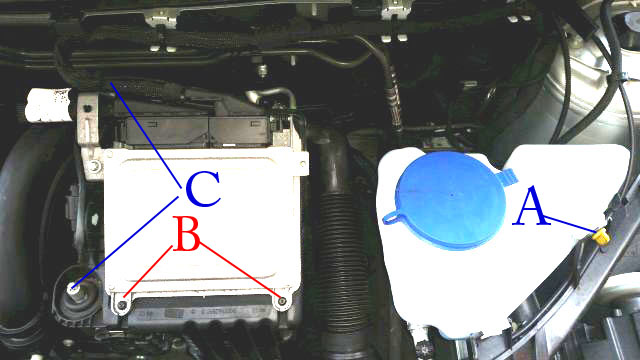
A. yellow locking clip for screen wash reservoir
B.Securing screws air filter housing lid .
C.Air filter housing body securing screws.
The washer bottle has a projecting moulded guide pin on its base (see page 19 for more detail) which locates into a hole in the support bracket. This clip, together with the moulded pin, keeps the reservoir in the right position when the yellow locking key is secured.
There may also be cable/tie's, clips behind the washer bottle which secure the screen washer hose feed pipe and electric pump wiring.
Once the bottle is free, carefully lift and move it to the right hand side. look for water leaks on any electrical equipment, better still syphon the fluid from wash bottle before removing.
Now remove the air filter housing With care Cut the fixing (Cable tie) holding a cable on the left side, top of the filter housing.
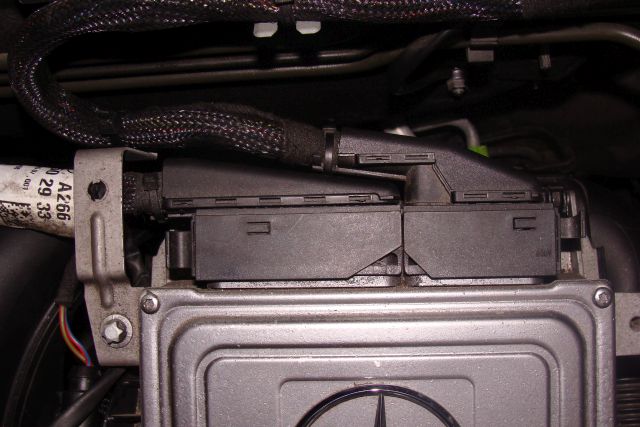
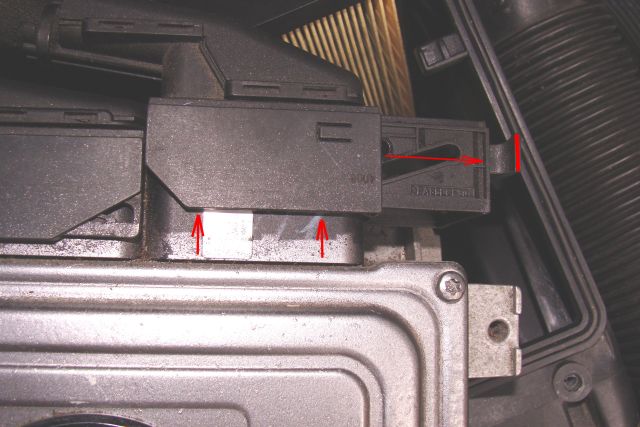
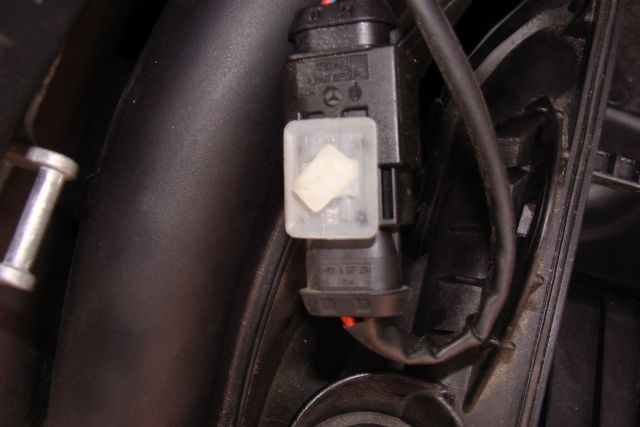
Now release the right hand, large multi-pin plug going to the ECU this is located near the bulkhead.
This is done by easing the grip sideways away from the plug, as you do so the plug will be withdrawn from the ECU. The will enable you to remove the filter housing lid complete with the left hand plug.
Now undo the two black headed Torx screws B. see above located at the front of the air filter housing
With the lid raised push it towards the bulkhead this action will release the lid from the plastic lugs at the top of the filter housing Lay the lid complete with the left hand multi-pin connect to one side.
You will now be able to release the cable clip on the left hand side of the filter housing, this is done by turning the clip 45 degrees the clip will then be released from the side of the housing
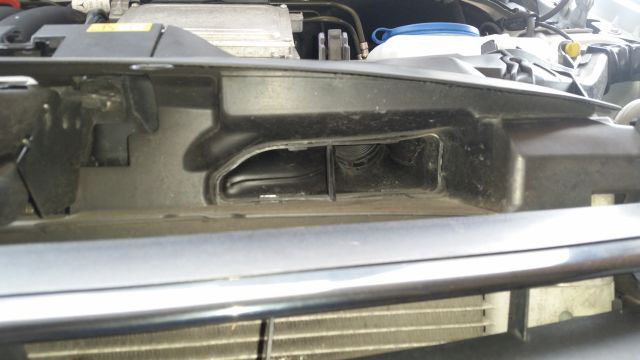
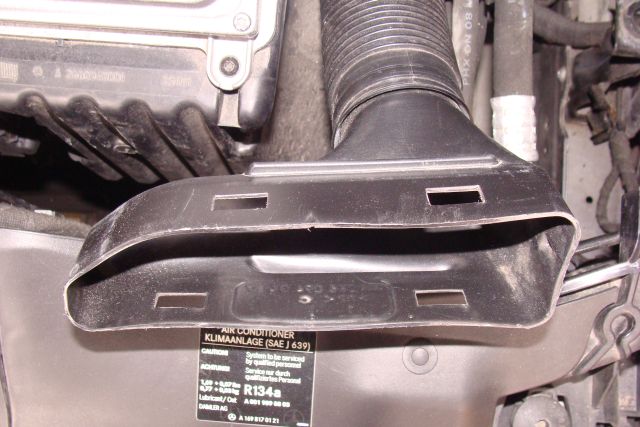
Next, release the air inlet hose from the front cross member,
The air inlet cowling is secured by four projecting lugs which fit into corresponding slots in the cowling, these have to be released before the hose complete with cowling can be withdrawn from the cross-member. (There may only be two lugs on some W169's).
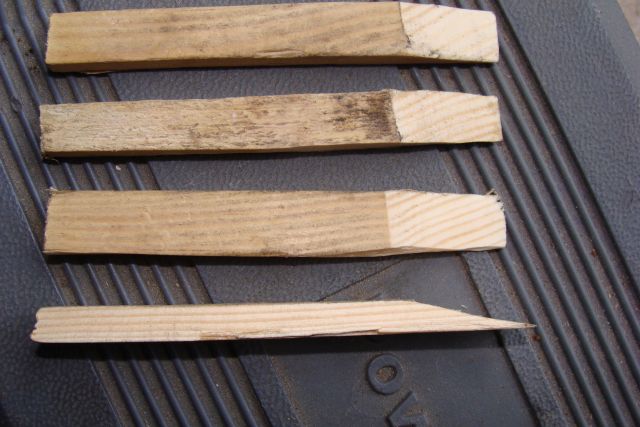
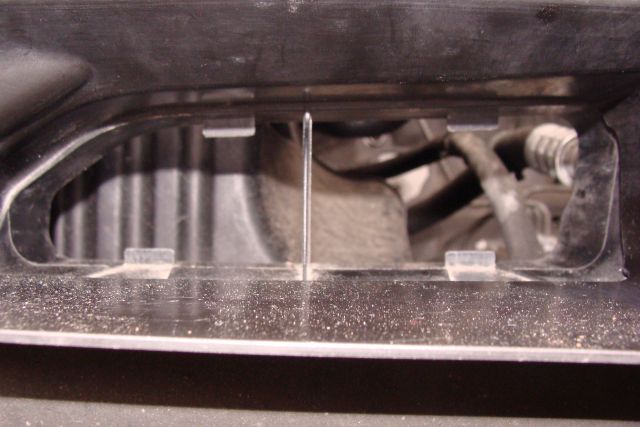
To release these I used 4 wooden wedges, approx 4" (inches long) 3/8 thick, 1/2" wide, wedge them in such a way as to raise the plastic of the cowling above the projecting lugs, when all 4 lugs are clear the cowling you can be withdrawn it from the engine bay side.(Some W169 models may have an outer flange which will need to be removed. See item 1 in the photo below 1 is withdrawn from the front of the cross member. Note This task on both models W169 & W169 is more difficult during cold weather conditions due to the inflexibility of the plastic.
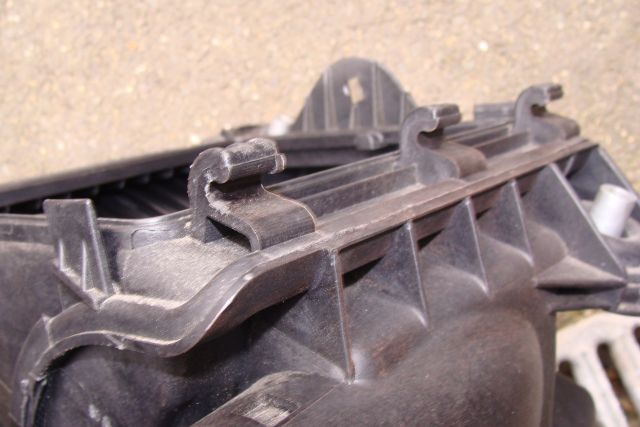
This is the air filter housing components off the W168 in this case there is an outer flange see item 1 which is removed and inserted from the front of the car. Some W169 may have the flange fitted.
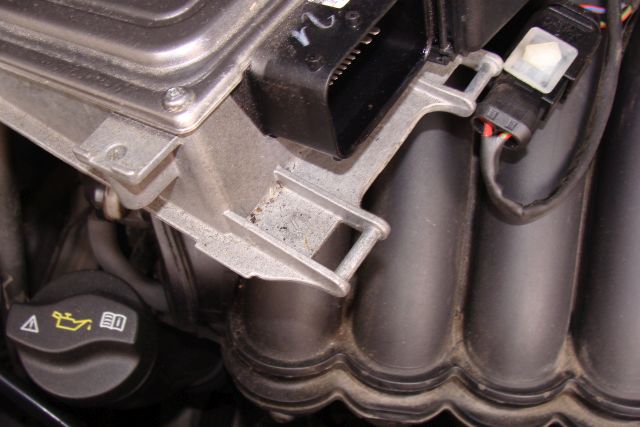
The two Torx screws C above, which secure the air filter housing in place can be removed. Note that the rear one is hidden by the cable loom going to the ECU at the top of the filter housing . These are to the left and behind the ECU cable looms. You require an E10 female Torx socket.
These two, together with a location pin on the underside of the filter housing (similar to the washer reservoir) firmly hold the air filter housing in place.
Having reached this point you will now be able to remove the air filter housing body completely from the car.
The Air filter housing needs to be gently pulled up and to the right this will allow the rubber hose going to the throttle body to be released and the projection on the bottom of the filter to be withdrawn from the recess.
You are now clear to remove the plugs.
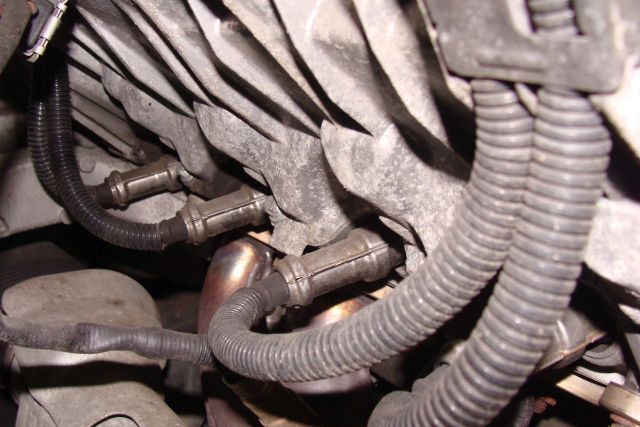
This is by far the best view of the plugs. When working from below the car, the exhaust manifold and steering rack get in the way making it very difficult to locate the plugs and keep the socket square with the plug, vital if the porcelain of the plug is not to be broken.
Now, you will have room and be able to remove and replace the plugs albeit you will be working by touch but able to feel the spark plug HT lead's.
I started from the near side. The HT leads were tight on the plug tops, so got a 16mm open-ended spanner which fits on the metal of the HT plug cap. This enabled me to grip the spanner and HT plug top together and apply enough force to pull it off the plug in each case.
Mercedes-Benz recommend a special tool which is not easy to find or buy. My method was good enough, providing you do not put any lateral force on the porcelain of the plug itself. I was able to do all the work by touch as it is almost impossible to see and work at the same time.
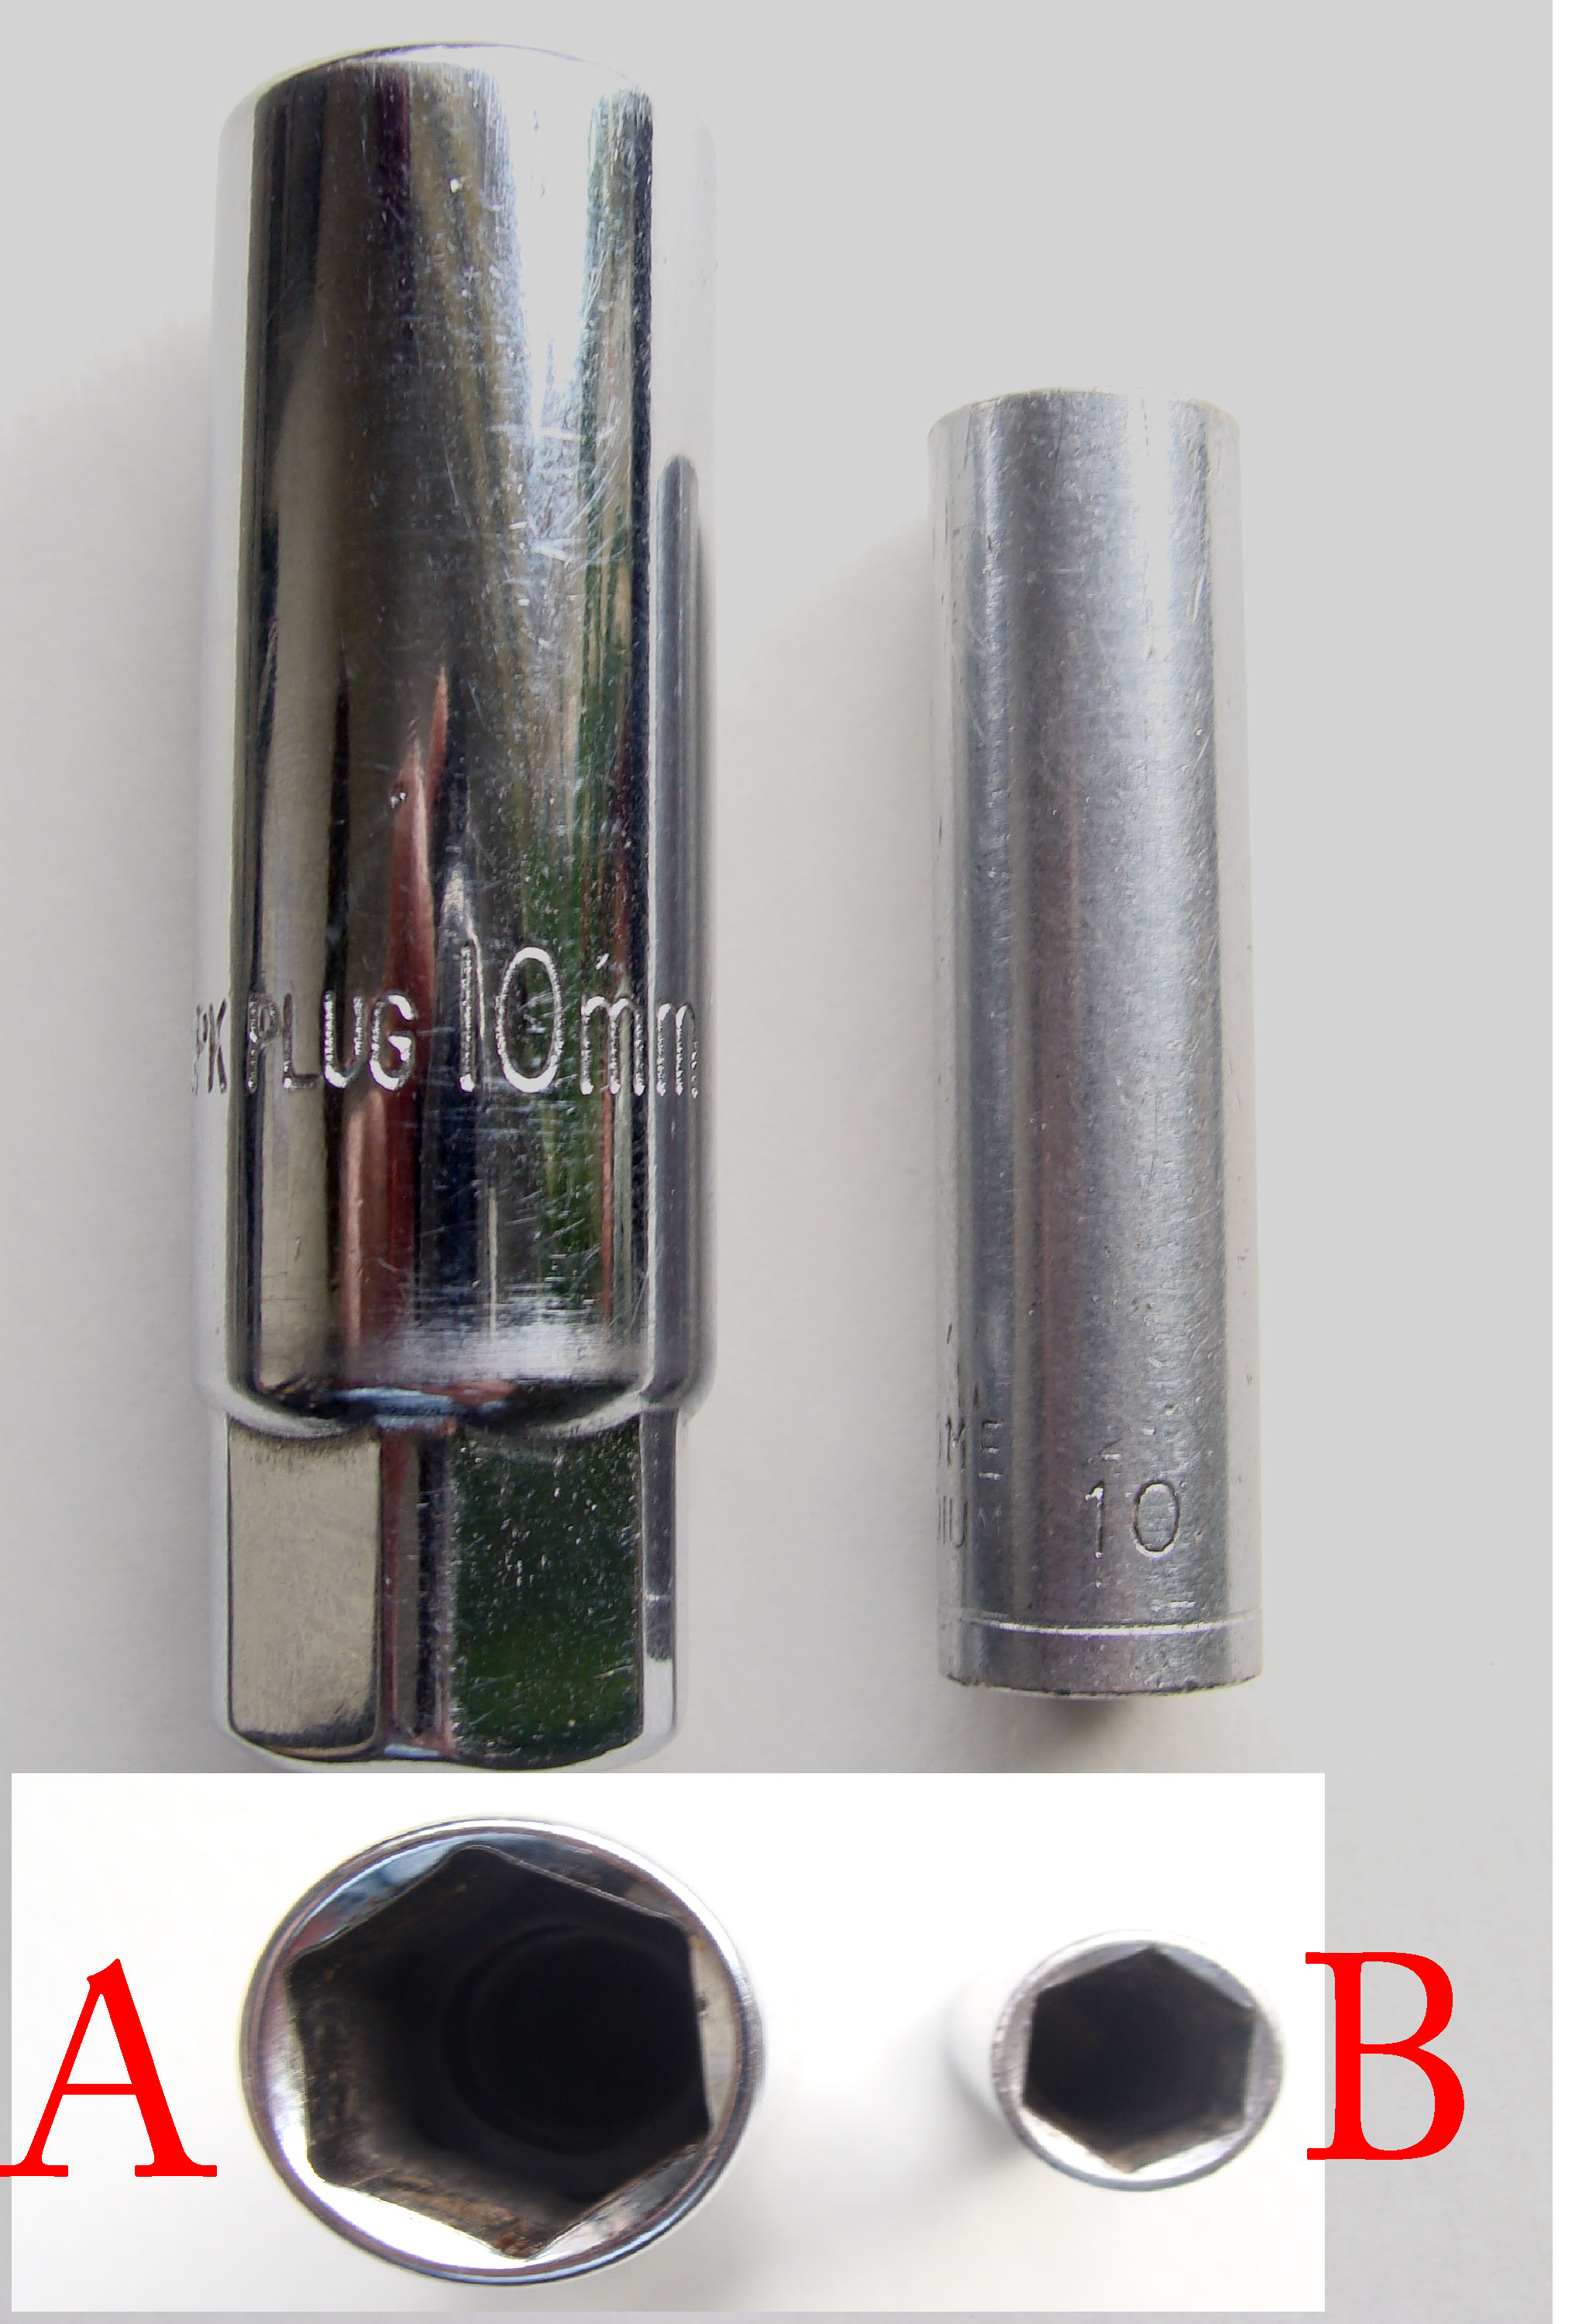
The plugs are a 10mm small type. If purchasing a plug socket you want it to fit a 10mm plug .Note that this is to fit a 10mm spark plug, do not buy a 10mm socket! obviously these are different tools. A 10mm spark plug socket and small extension bar was needed as well as a small ratchet.
I used 1/2" drive, this was adequate for the job and was easier to handle as the space is still limited. As with all plug removal, as soon as possible stop using the ratchet and undo by hand.
Normally the plug recess would be blown out before removing plug's however as these are near horizontal, this is not necessary as any debris cannot fall into the cylinder chambers when the plug's are removed. BUT if you do have an airline to hand then no harm is done by following that routine before the plugs are removed.
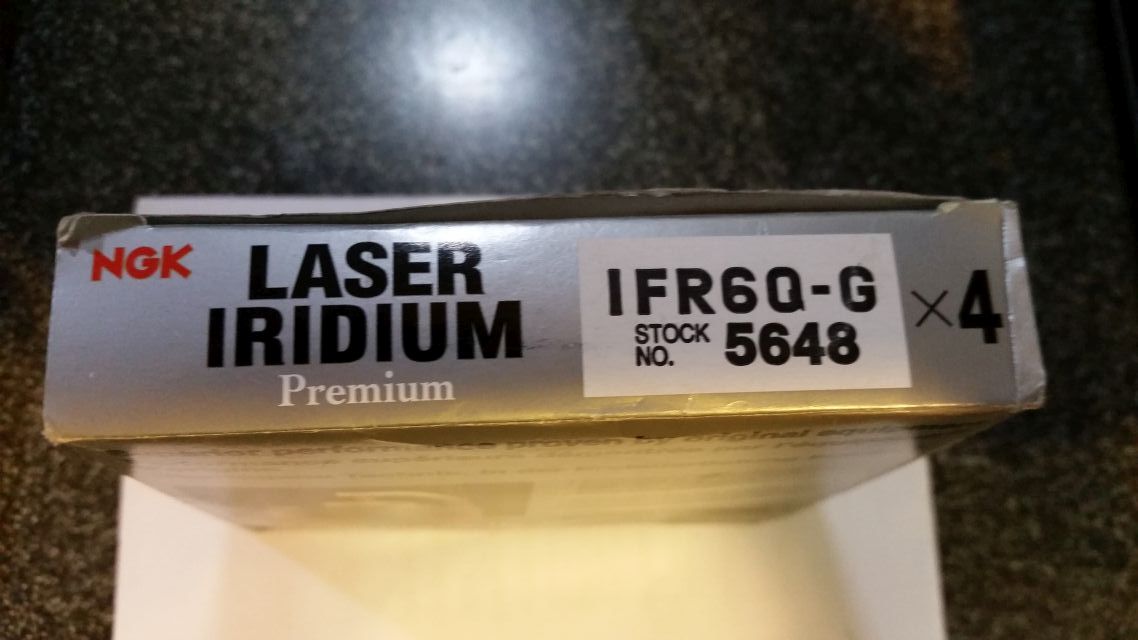
I used NGK:-
Note A is a long reach 10mm socket to fit a 10mm sparking plug and has an internal rubber sleeve with in this case a 3/8" drive.
B is a 10mm long reach general purpose socket.
But the OEM plugs were Bosch:
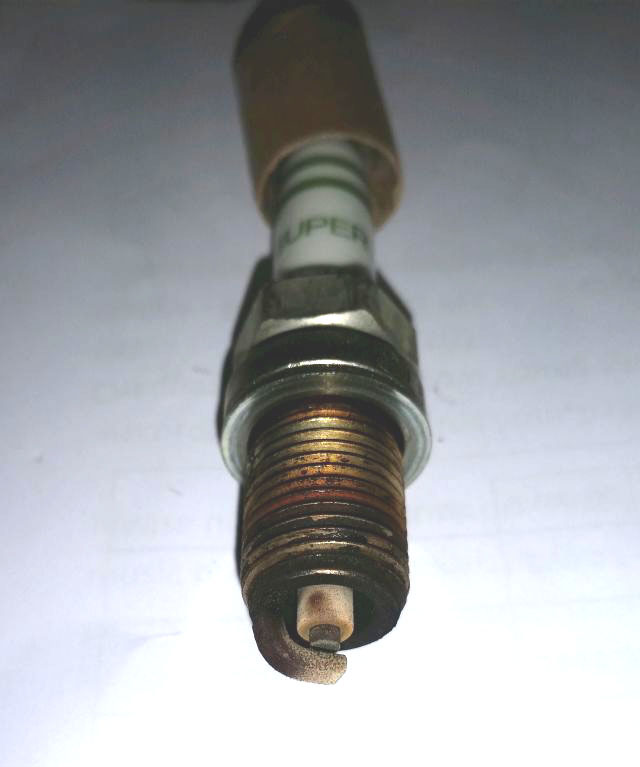
I removed and replaced each plug separately in order not to mix up the HT leads. When the plug is removed, bear in mind it is almost impossible to see these leads once removed and incorrectly fitted will make the car run like a traction engine if it runs at all! when I removed my existing spark plugs looked like this:-
Although dirty the plugs are certainly not worn out, although I have still fitted new.
This was after 13,500 miles and 3 years. If the Mercedes Benz service schedule is to be followed then I was one year late in replacing the plugs due mainly to the degree of difficulty anticipated is undertaking the job. I was also aware that Mercedes-Benz indicate that the plugs should be changed at 25000 miles. the pre scheduled change of plugs of every two years is based on an average milage of 12500 miles per year or 25000 miles if you are doing less miles then the plugs will obviously last longer, however you might like to inspect and clean them after two years Re-fitting plugs When first offering the plug to the car start the procedure using the socket and extension bar only, this will avoid cross threading. Any resistance felt may indicate a cross threading plug.
When the plug is housed torque to 28Nm. However this is easier said than done as it is virtually impossible to get a standard torque wrench into such a confined space and apply the correct amount of torque.
I think only a smaller torque wrench will do here so a 3/8 drive would be ideal. If you do not have a torque wrench, or cannot get your wrench in to tighten, then tighten by hand but do not over over tighten. Remember, plugs are subject to vibration and are under pressure, so they do need to be fully tightened. New plugs will have a new gasket seal which will be compressed as the plug is tightened.
Repeat this procedure for all 4 plugs, the final one as with the W168 is more difficult, you may be able to get at from the left side (as distinct from facing the front of the car). I could slide my hand down and feel the HT lead. However space is very tight which makes it difficult to remove the HT lead and cap from the fitted plug.
Having completed your plug change, you may want to change the air filter as part of your service
see page 9 for more details
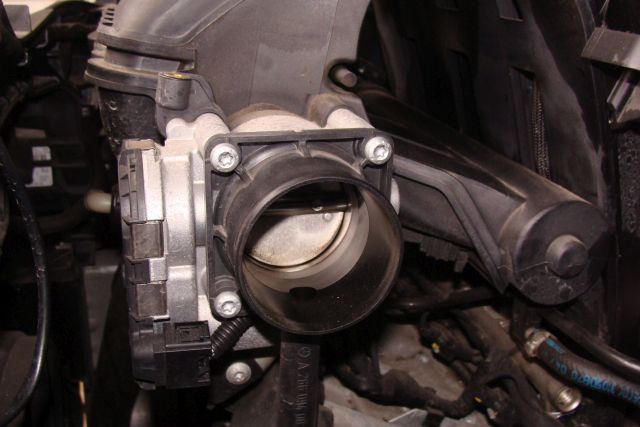
To replace the air filter housing, lightly grease the rubber gasket that goes onto the throat of the throttle body.
locate the guide/location pin on the underside of the filter housing into the hose by touch.
I put my hand in the housing and guided the rubber gasket of the air outlet to the throttle body making sure it fits correctly. Then fit the rear Torx screw followed by the front.
Now replace the cowling, fitting it into the cross member making sure the luge are engaged in the cowling.
Replace the outer plastic inlet flange where fitted, this is done from the front of the car.
Replace the air filter cover/lid, re-fit the right hand multi-pin connector.
Offer the plug to the female on the ECU ensuring it is aligned correctly now push the slid to the left easing the plug down at the same time, you will hear a click when fully housed
fit a new cable tie to the left hand ECU loom .
Tighten the 2 Torx screws to 10Nm and fit the left hand side cable clip which slots in to the filter housing and rotate 45 degrees. Optional, fit the new air filter or replace the old filter If you have an airline these can to a large degree be cleaned by blowing air from the underside of the filter element, replace, close the housing lid.
Replace and tighten the two black Torx screws to 6Nm. Just over hand tight. Do not over tighten.
Now replace the washer reservoir. Do not forget to check the cable tie which secures the washer hose and pump wiring. visually inspect all items removed
Record plug and filter change as necessary, Road test and pat yourself on the back You have just saved yourself well over a hundred pounds £200.00 M-B price which may include the price of the plugs
Even more if you have the job done by Mercedes-Benz workshops plus you have the benefit of not loosing the car while the work is undertaken.
I also ask this question? Would you know if the job had been done? Not unless you ask for your used plugs back!.
A big thank you to Dave who provided me (lofty) with information, some photographs and the inspiration to get on and produce this page which we both know will help many owners keep running costs down. Thank you Dave
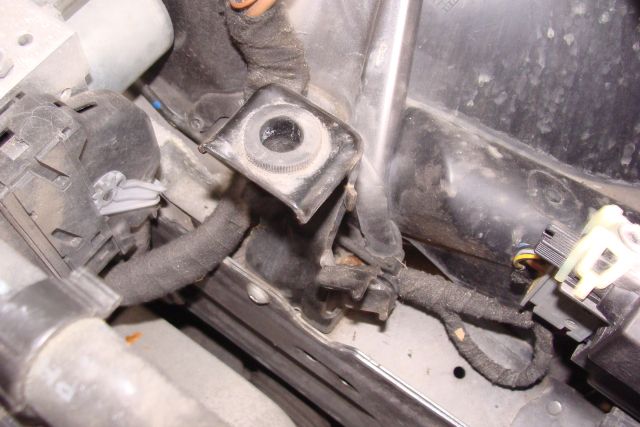 The washer bottle has a projecting moulded guide pin on its base (see page 19 for more detail) which locates into a hole in the support bracket.